How to Create a Contact Form with Discord and NextJS (FREE)
How to avoid setting up STMP providers and complex email validations and create a discord channel to send contact forms information.
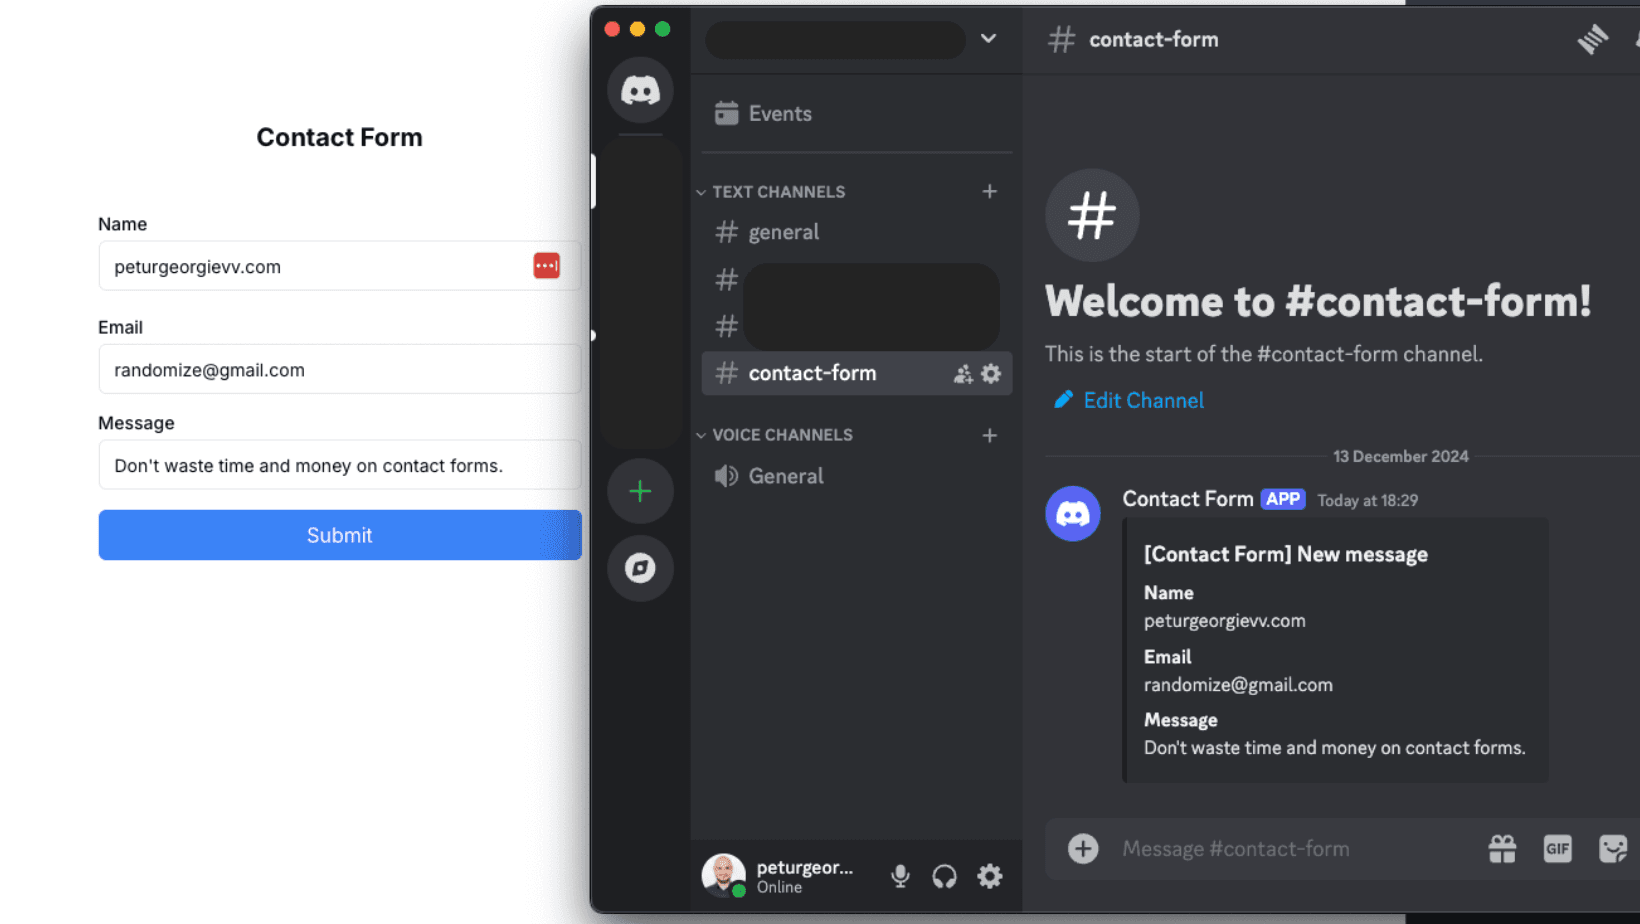
I've had the painful experience of setting up contact forms when I didn't already have an email provider for a landing page. It's not necessary to do anymore.
You can build a notification center for your whole business by utilizing the free resources out there. It could be further extended as your imagination could go.
In this article, I'll show an example of creating a simple contact form in NextJS with actions, but it could be easily done with API routes. The form itself is not pretty, or validated, as I'll leave this to your imagination but it sends a message to our Discord channel which is the main goal.
The full code is at the end of the article in the branch of my public Nextjs starter.
Initial setup (Discord)
To create the easy contact form, you'll need a few things, one of them is a Discord server. I'll not go into details here because you probably know how to set it up it, but you don't check their support page on how to create it.
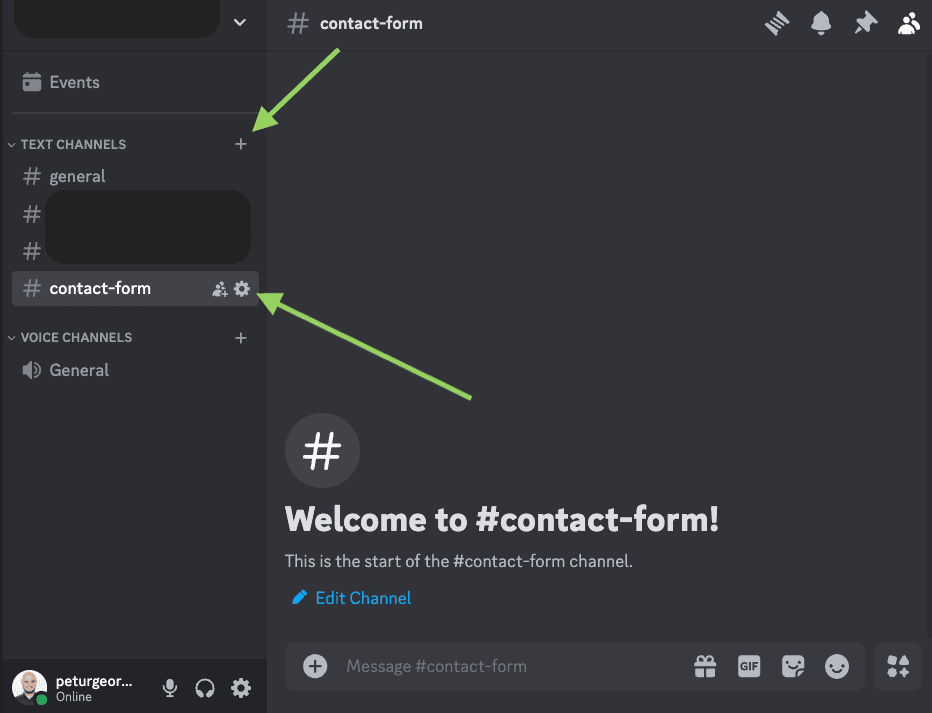
Next step is to get us a webhook from one of our server channels. Create a channel and click on the settings icon on the right of it.
- First arrow shows where to click for channel creation and the second is to open settings
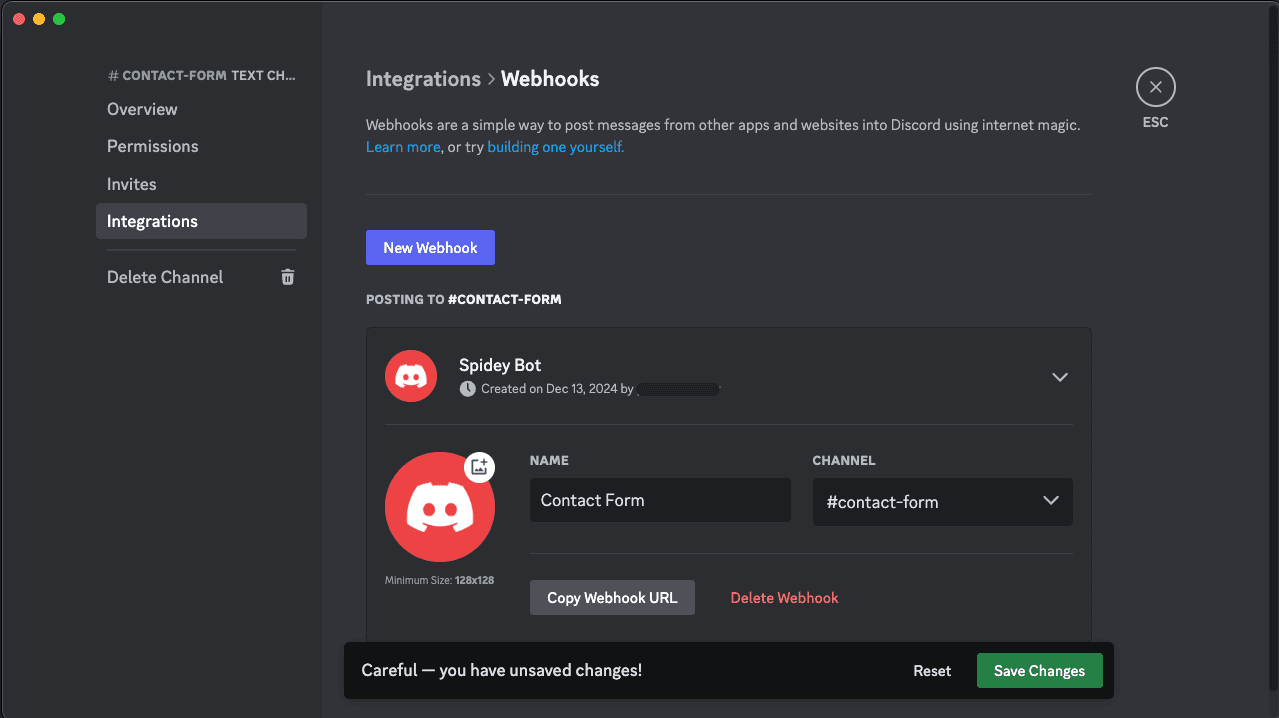
The main goal is to get a webhook which we'll send data to. Move to the integrations tab and create a new Webhook with a name you like, in my case Contact Form. When done, copy the Webhook URL and save it somewhere as we're going to need it in the next steps.
Pause. If you like my articles, I would greatly appreciate it if you could give me a follow on X as I'm building my audience... A subscribe to my newsletter is highly appreciated too, it's in the footer, along with all my social media accounts!
Adding our NextJS Page and Form
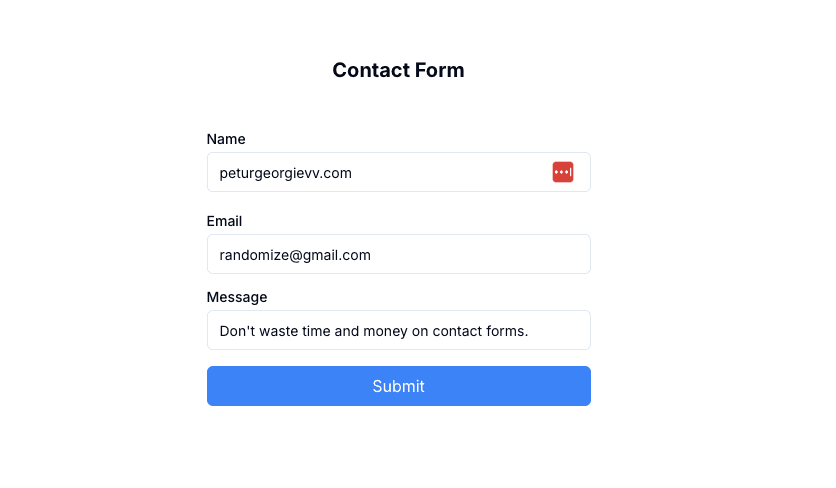
To submit a contact form you'd normally have a landing page that has it at the bottom or a contacts page. In our case we don't have a full website, so we'll create a new page and put on a simple form just to show how it works.
We'll create a client component that has a form and three fields in it:
- name
- message
"use client";

import Input from "@/common/Input/Input";
import { zodResolver } from "@hookform/resolvers/zod";
import { useTranslations } from "next-intl";
import { useForm } from "react-hook-form";
import { z } from "zod";

const formSchema = z.object({
  name: z.string(),
  email: z.string(),
  message: z.string(),
});

export default function ContactForm() {
  const t = useTranslations("contactForm");

  const handleSubmit = async (data: z.infer<typeof formSchema>) => {
    console.log(data);
  };

  const form = useForm<z.infer<typeof formSchema>>({
    resolver: zodResolver(formSchema),
    defaultValues: {
      name: "",
      email: "",
      message: "",
    },
  });

  return (
    <main className="flex min-h-screen flex-col items-center justify-start gap-8 p-24">
      <h1 className="mb-4 text-xl font-bold text-center">{t("title")}</h1>
      <form
        onSubmit={form.handleSubmit(handleSubmit)}
        className="flex flex-col gap-4 w-full max-w-sm"
      >
        <Input label="Name" name="name" register={form.register} />
        <Input label="Email" name="email" register={form.register} />
        <Input label="Message" name="message" register={form.register} />
        <button
          className="bg-blue-500 text-white px-4 py-2 rounded-md"
          type="submit"
        >
          Submit
        </button>
      </form>
    </main>
  );
}
We're using Zod for form validation with RHF. If you don't know how to use them, you can check my article for Zod Discriminated Unions. We've implemented a simple form and applied some basic styles with Tailwind CSS.
If you're hasty, the full code is at the bottom.
Sending a Message to Discord
To finish up our form we need to send a message on form submit. The app router version of NextJS promotes server actions and we want to protect our webhook URL to avoid being spammed, so we'll add an environment variable in our .env file.
Open up .env and add the following variable with the Webhook URL you copied previously.
DISCORD_WEBHOOK_URL=https://discord.com/api/webhooks/<webhook_id>/<webhook_token>Create a file to hold your server action, in my case in folder /app/[locale]/contact-form/contact-form.actions.ts and paste the following code.
"use server";

type ContactFormData = {
  name: string;
  email: string;
  message: string;
};

type ContactFormResponse = {
  message?: string;
  error?: string;
};

export async function sendDiscordMessage(
  data: ContactFormData
): Promise<ContactFormResponse> {
  const { name, email, message } = data;

  const payload = {
    embeds: [
      {
        title: "[Contact Form] New message",
        fields: [
          { name: "Name", value: name },
          { name: "Email", value: email },
          { name: "Message", value: message },
        ],
      },
    ],
  };

  if (!process.env.DISCORD_WEBHOOK_URL) {
    console.error("Discord webhook URL is not set");
    return { error: "Something went wrong" };
  }

  try {
    const response = await fetch(process.env.DISCORD_WEBHOOK_URL, {
      method: "POST",
      headers: {
        "Content-Type": "application/json",
      },
      body: JSON.stringify(payload),
    });

    if (response.ok) {
      return { message: "Message sent successfully" };
    } else {
      return { error: "Failed to send message" };
    }
  } catch (error) {
    console.error("Error sending message:", error);
    return { error: "Failed to send message" };
  }
}
It's the simplest way to use fetch, you could add more abstraction, validation, but this is not the goal here. We want to just show how easy it is to create an integration!
Return to your page/component and change the handleSubmit function with the following:
  const handleSubmit = async (data: z.infer<typeof formSchema>) => {
    const response = await sendDiscordMessage(data);
    console.log(response);
  };
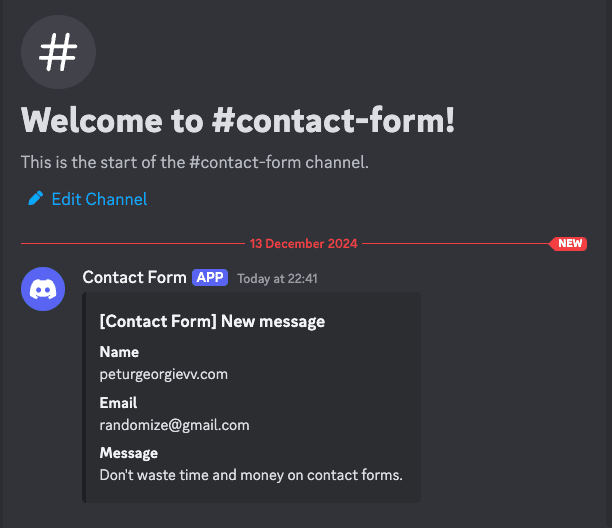
Fix your imports and you're all set up. Write up your data and hit the submit button! Something similar to the photo below should've pinged your phone. The full code is here:
Final improvements
I'd suggest you to do some of the following things:
- Create a channel for each contact form you have to have better separation of concerns
- Abstract the Discord API calls into a package or util to reuse later on
- Add proper form validation, messages
- Avoid having submissions from the same user (at least some basic session storage validation)
In my opinion have a Discord server for your business, send there logs, errors, contact form messages. Use it as a place to "run" your business. It's easily managable, and in your pocket. For most projects you won't even need SMPT setup or services like SendGrid, so just go with this if you like.
If you have any questions, reach out to me on Twitter/X or LinkedIn. I've recently created an empty Instagram account, still haven't posted but I'll try... A follow is highly appreciated at all places!
You can subscribe to my newsletter below to get notified about new articles that are coming out. I'm not a spamer!
Related articles
How to improve your SaaS SEO & LLM's searches with NextJS (FAQs)
NextJS FAQs SEO boost. Increase your conversions with practial examples on improvements.
How to automate social media with n8n, AI and PostFast (Download Workflow)
Automating social media should be easy. Self-hosted tools like n8n allowed us to have creative freedom.

How to add Discord alarms to self-hosted Netdata (Coolify)
Having monitoring without alerts is like having a laptop without internet. It's good to have, but mainly useless.
Create Production Dockerfile for NextJS - Deploy Everywhere
Dockerfiles aren't hard to do. You do it once per framerwork like NextJS and use everywhere!
How to Add Internationalization to NextJS app router (next-intl)
Adding internationalization is easier than it looks. Good apps benefit from it even if there is no need to have it. Improves code readability!
NextJS Starter with App Router - TailwindCSS + ShadcnUI (partially)
Craft an extendable starter with NextJS App router for use in your production apps. Use Tailwind and Shadcn for styling.
My Newsletter
Subscribe to my newsletter and get the latest articles and updates in your inbox!