How to add REDIS in Coolify with NestJS?
Adding REDIS is a performance boost, and you can easily do so in Coolify.
In this article, I'll show you how to add REDIS in NestJS with Coolify in a few simple steps. I'll give you an example from my own deployed instance (not the production one though)
The reason is that I struggled to add it when I started, as you can't directly use the name of your service, and you have to use the id of the container. I'll finish with a real-life use case from one of my projects that uses REDIS in a similar way.
Prerequisites
For this tutorial, I assume that:
- You're already kind of familiar with Coolify
- Have a basic understanding of what is REDIS
- Have used NestJS before (If you don't know what it is, you can start by reading how to setup up a project with it)
You need to have a coolify environment deployed already, and a NestJS simple REDIS service. If you don't, you can read how to create it.
Setting up our environment
We need to have a project and environment set up in coolify so we could add Redis as a project.
Your NestJS service should be hosted on the same VPS as the REDIS instance so they would be able to communicate internally!
If you haven't created a project. Here is an example:
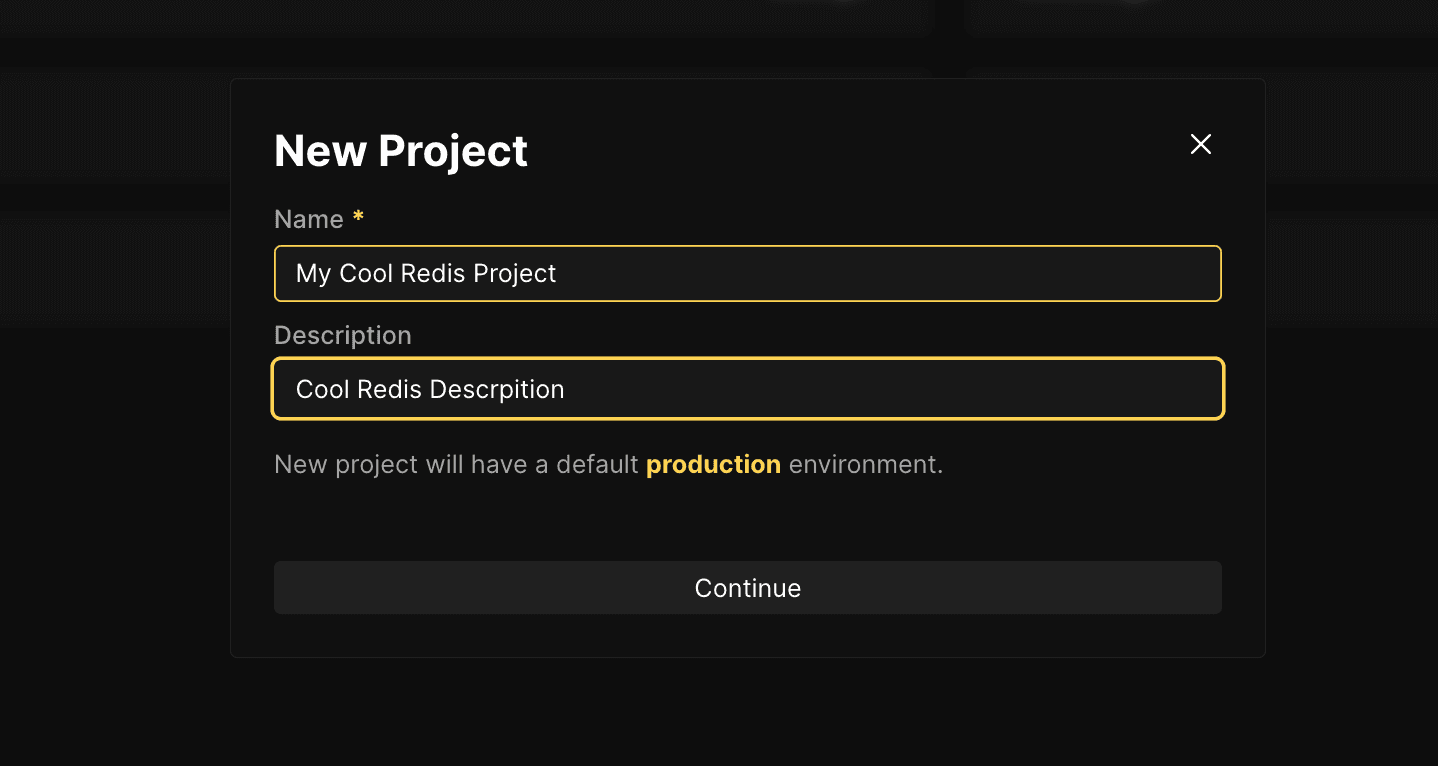
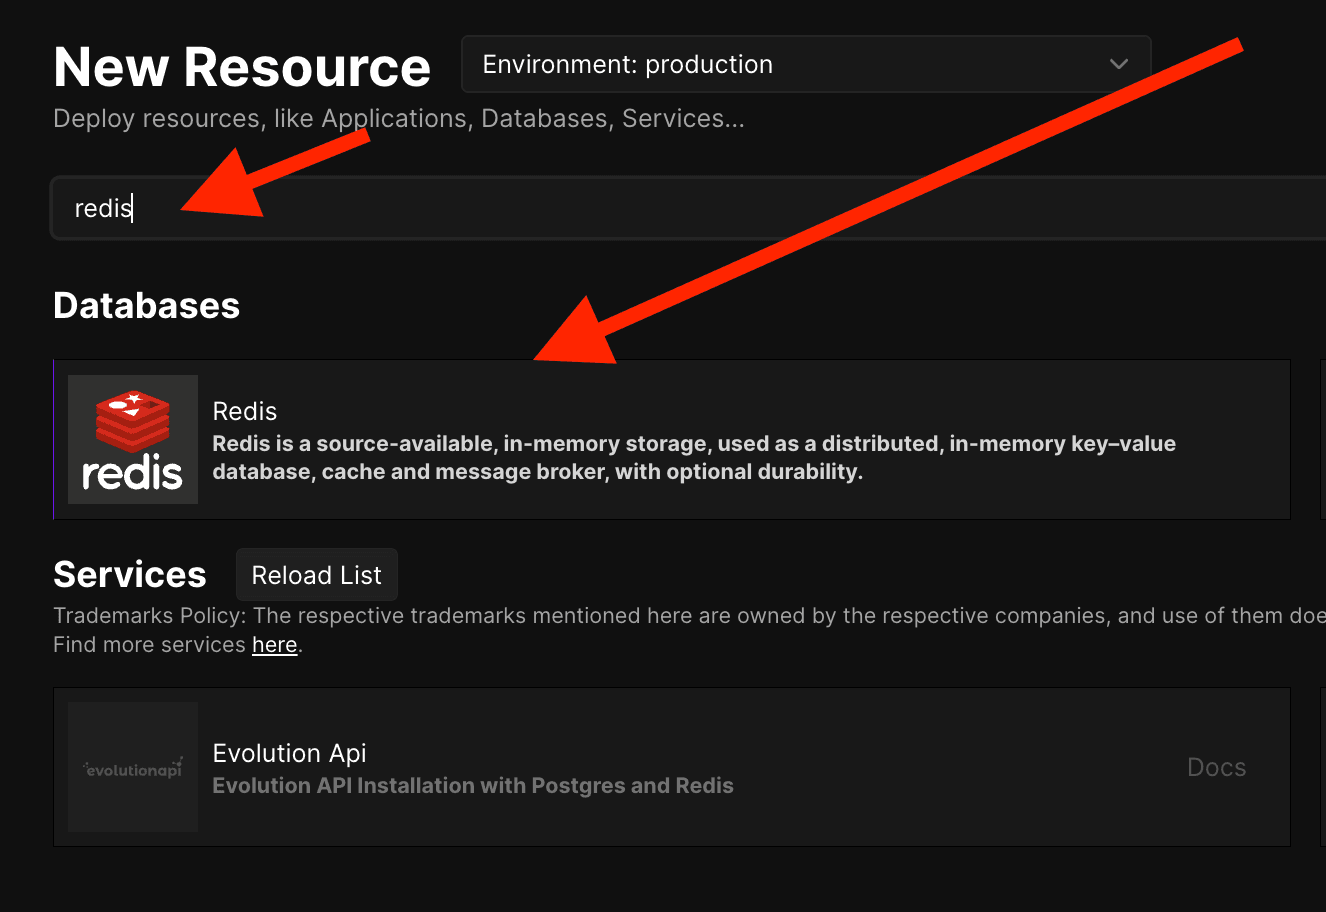
This would create a production environment for you too. Go inside it, and click on Add New Resource.
Write in the search bar - Redis, and click on the element as in the photo and choose the server in the next step where your NestJS server is located.
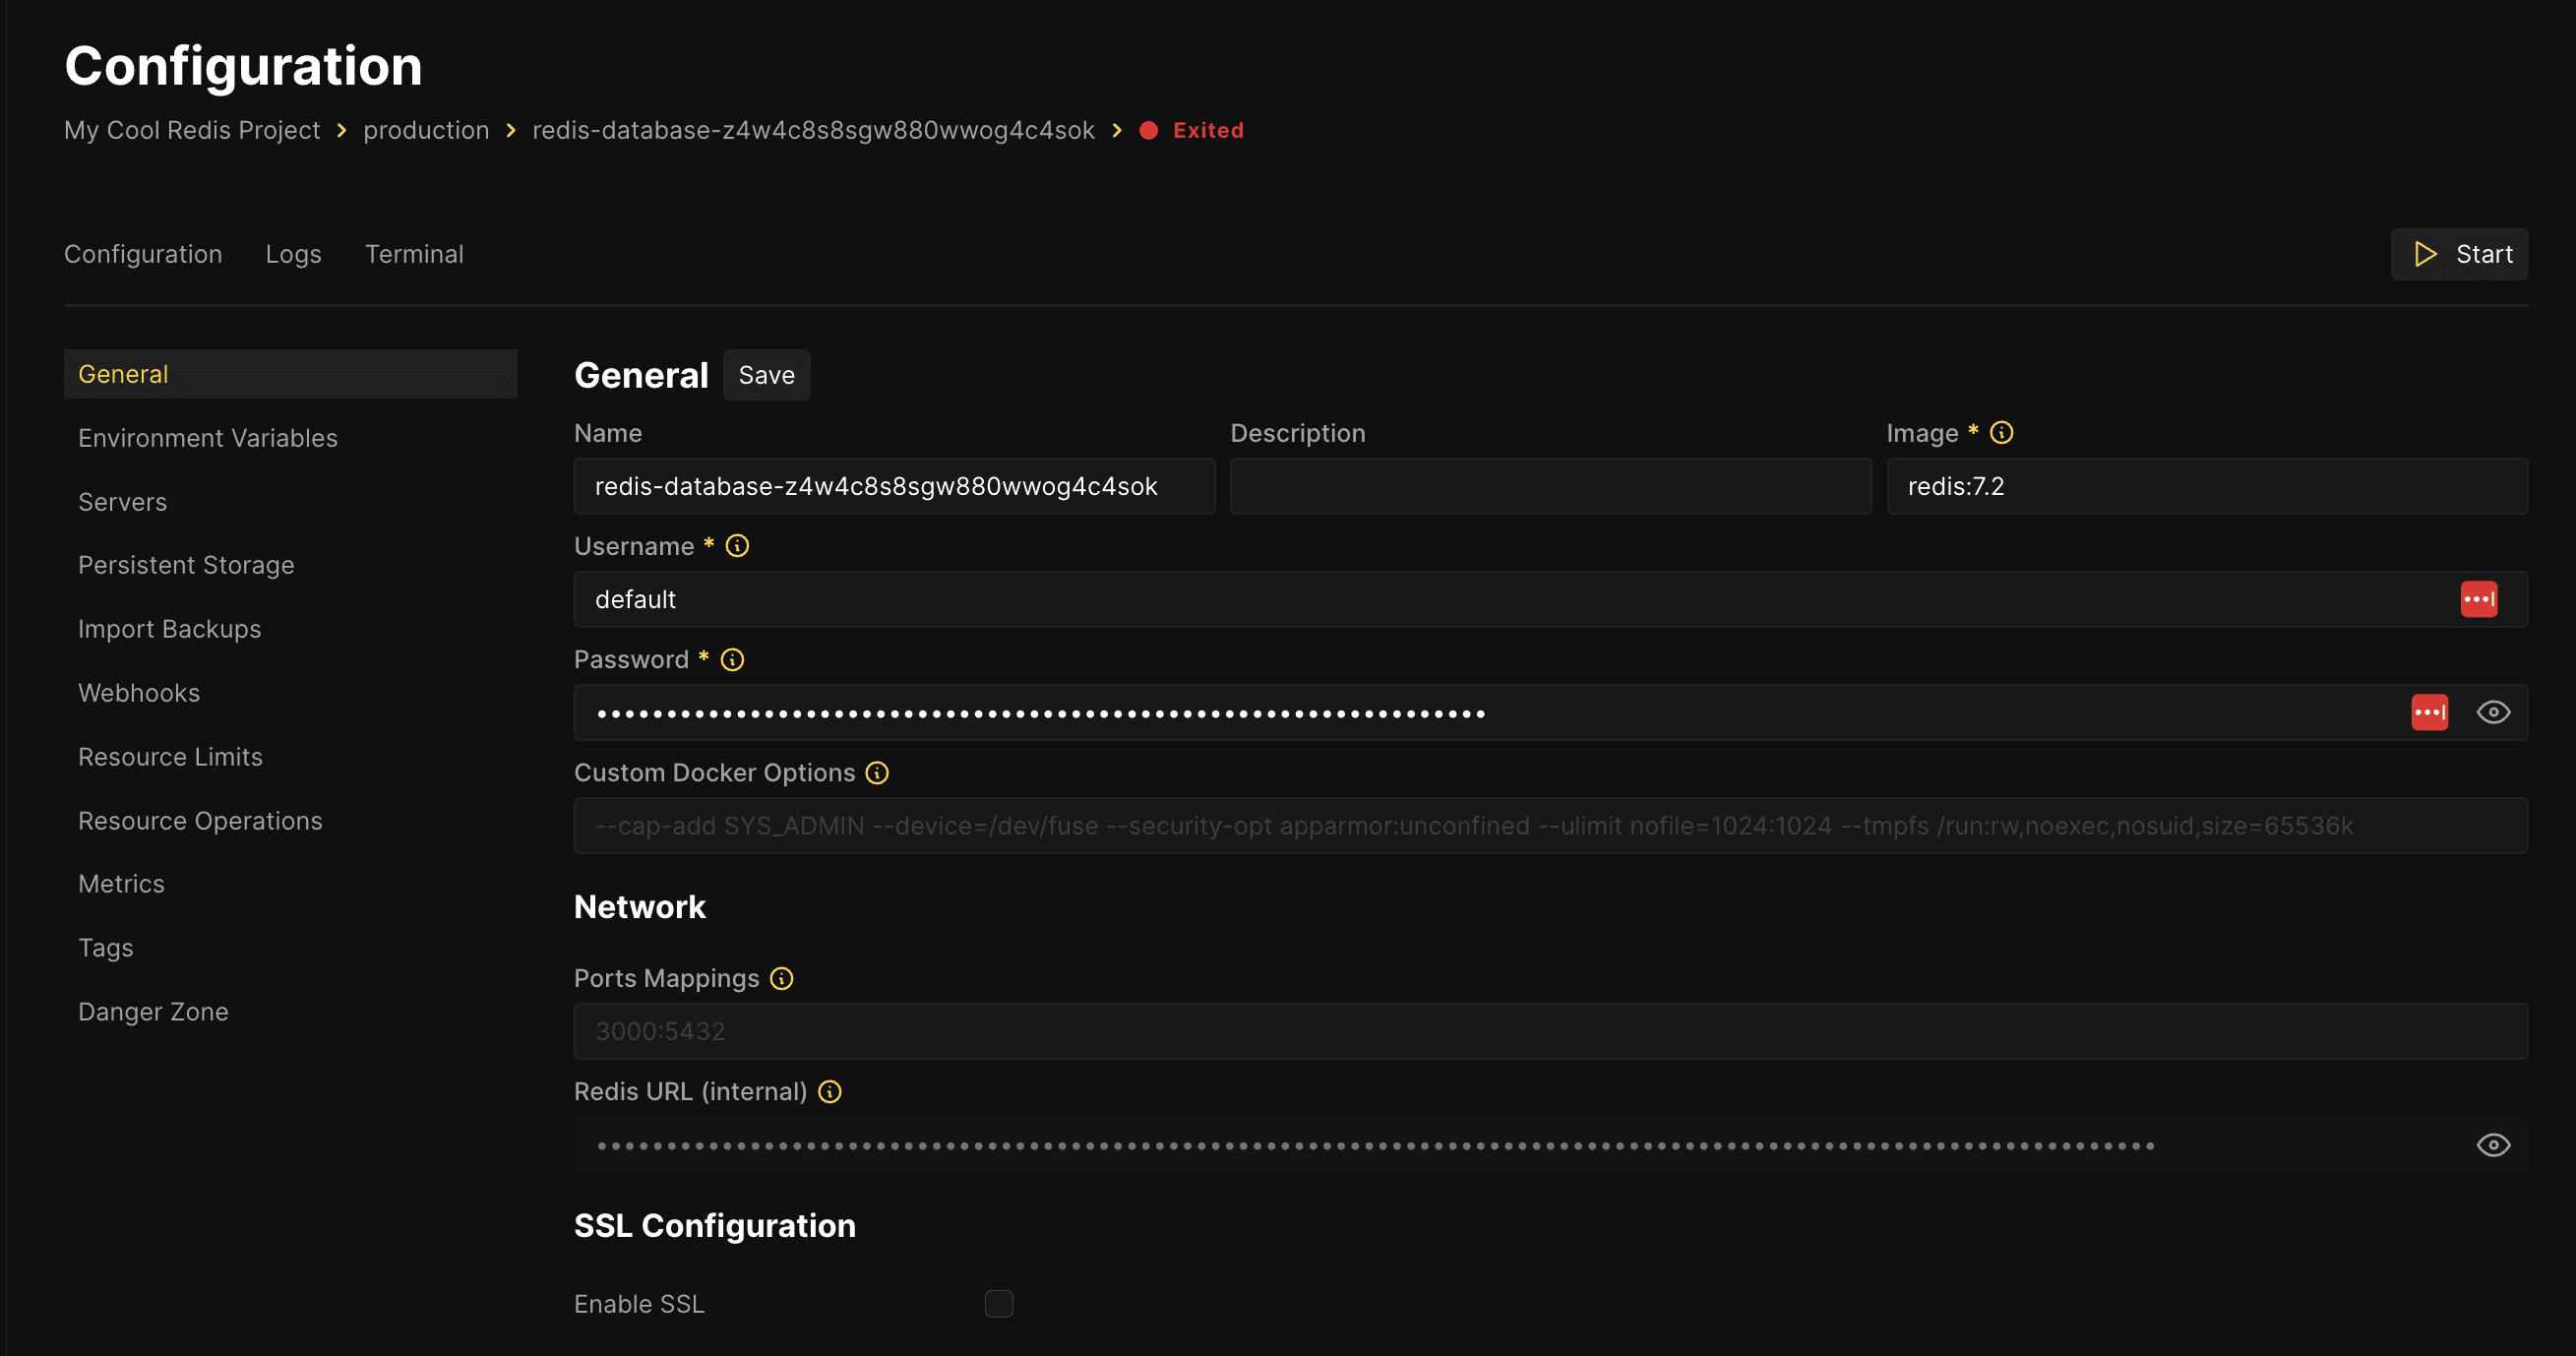
You'll be presented with the turned-off still REDIS container with some options predefined as in the photo below. There is no need to change anything here. We click "Start" on the top right and run the container.
From this step, onward we have a running REDIS instance, and now we need to connect it to our NestJS service.
Adding Environments for NestJS
I'll give you a simple tip for all coolify services. If you're unsure what is the ID of the container, just take the part of the URL as shown.
https://<coolify-domain>/project/<project-id>/environment/<environment-id>/database/<TAKE_THIS>We'll need a few environments so that it could work:
- REDIS_HOST - Copy the "TAKE_THIS" param from the URL and put it there.
- REDIS_PORT - If you haven't made any changes it is 6379
- REDIS_PASSWORD - The password is from the photo above, where we're in the instance. Just click on the "eye" icon and copy it. It's also present in the "environment variables" tab too.
In addition to those, I normally add a REDIS_TTL_SECONDS env so that I can have a global setting for all caching I do that I override at places if needed.
Setting up NestJS
Here I've already written on how to do it in the article for REDIS with NestJS, but I'll show a small code snippet here, so you can understand what might your initialization code look like.
 export const redisOptions = (): RedisOptions => {
  let totalRetryDuration = 0;

  return {
    host: process.env.REDIS_HOST,
    port: +process.env.REDIS_PORT || 6379,
    password: process.env.REDIS_PASSWORD,
    showFriendlyErrorStack: true,
    lazyConnect: true,
    commandTimeout: 1000,
  };
};
I've oversimplified it for our use case. You could later on use this in the REDIS creation as options.
With this, you can now go to your NestJS service in Coolify and move to the Environment Variables tab. There add the variables from the previous section with their values.
With this, our implementation is actually complete.
Real-Life Example
I'll give you a good use-case on why caching improves your performance.
In my Social Media Scheduler project - PostFast, all photos are generated with signedUrls as the buckets are private, which if taken on every request could become a performance bottleneck. (just to add, you can cross-post to all social media platforms pretty cheaply)
What I do is generate a URL with time from 2 to 24 hours depending on the importance of the photo and cache it in REDIS. Now in each request, I check if a key in REDIS exists with my bucket key, and directly return the URL instead of generating a new signed URL for every refresh.
There are a lof of use-cases you might find for it, but small things do improve the UX as in my case.
Small piece of advice
Don't overuse caching. It's a great benefit to have it, but it comes with some caveats. You need to know that invalidating your cache correctly is one of the hardest things in large apps, as you have to track a lot of things.
Cache first things that you can easily invalidate, or cache by TTL those that are not changing frequently and are not business important.
Don't start caching right away as this might actually hide the database or other performance problems you might have. REDIS should be an addition and performance boost, not a life-saver for badly written code.
If any of this is interesting or helpful, a follow on Twitter/X or LinkedIn is highly appreciated too!
Related articles

Deploy Prometheus and Grafana in Coolify (Code Example)
Step by step tutorial to deploy prometheus and grafana in coolify with human readable names.

How to add Discord alarms to self-hosted Netdata (Coolify)
Having monitoring without alerts is like having a laptop without internet. It's good to have, but mainly useless.

How to Build Robust Integrations for your Application? The production way!
Third-party integrations sound easy, but doing them in a way to not degrade the performance of your app is hard.
Is Coolify Good for Production Deployments?
Self-hosting with Coolify can be a pleasent adventure, but you need to know the pros and cons.
How to deploy monitoring on your VPS with Coolify and Netdata
Deploy server-wide monitoring with Netdata and Docker compose for any VPS. Use in Coolify with a GitHub repository.
Create Production Dockerfile for NextJS - Deploy Everywhere
Dockerfiles aren't hard to do. You do it once per framerwork like NextJS and use everywhere!
My Newsletter
Subscribe to my newsletter and get the latest articles and updates in your inbox!