Setup a NestJS Project with GraphQL, TypeORM - Production Ready
Build a scalable structure with NestJS, GraphQL and TypeORM with PostgreSQL for your database. Be production ready, and ready to scale.
To build a scalable app, we need to plan it before it's already live. You might think: "I'll build it now and refactor it to make it scalable when users come". While this might be possible and doable for smaller apps or the type that doesn't have much logic behind them, it's too much of an effort for bigger ones... In my opinion, the MVP definition has changed with time, but more on that in the future.
In this article, we'll explain why planning, and templating will save you time, and create a NestJS boilerplate with GraphQL and TypeORM installed for you to use in your next project. The link for the repository is at the bottom. This will be used in future articles as a starting point. It's going to be a medium to a long one.
This tutorial assumes you have basic NestJS knowledge and won't go into detail about the controller, provider, module, etc. You can read more about those in the NestJS documentation.
Planning saves you time
If you directly start coding without a plan and an end goal, there will be issues that will make you refactor a big part of your code, or sometimes the whole project. Not that refactoring is bad, as it's part of the process, but if you can avoid it, why not save your time? Take some time to plan what you'll need for your application as features. To choose what database, payment provider, third-party service, or even what language to write it in, the end goal for your project must be clear.
If you know how to structure your projects or have already passed through this process, building another app is easier. This is why it's important to write reusable code. What I do and I've seen is creating a template repository. Something that we will kind of do right now.
Template repository in our case might be an already set up NestJS project with authentication, database layer, caching, or anything reusable for our next venture. Let's start with creating our own!
Building our NestJS project
NestJS documentation is pretty clear, and one of the best I've used or seen, but to build the app we need to connect all the dots. Let's first create a GitHub repository and clone it locally.
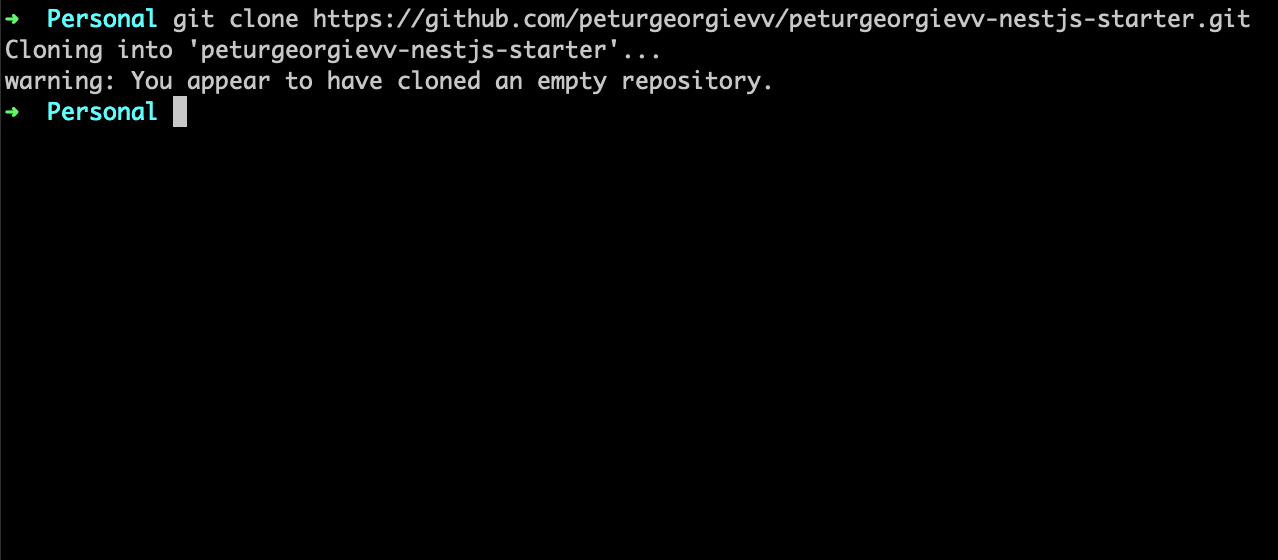
Without changing anything in our terminal we run those two commands below where peturgeorgievv-nestjs-starter is the name of your git-repo in this case. (I'm using node 18)
npm i -g @nestjs/cli
nest new peturgeorgievv-nestjs-starter
As it's working you will be prompted what package manager to use, I use npm, and when the installation process is finished you will see a screen similar to the photo below.
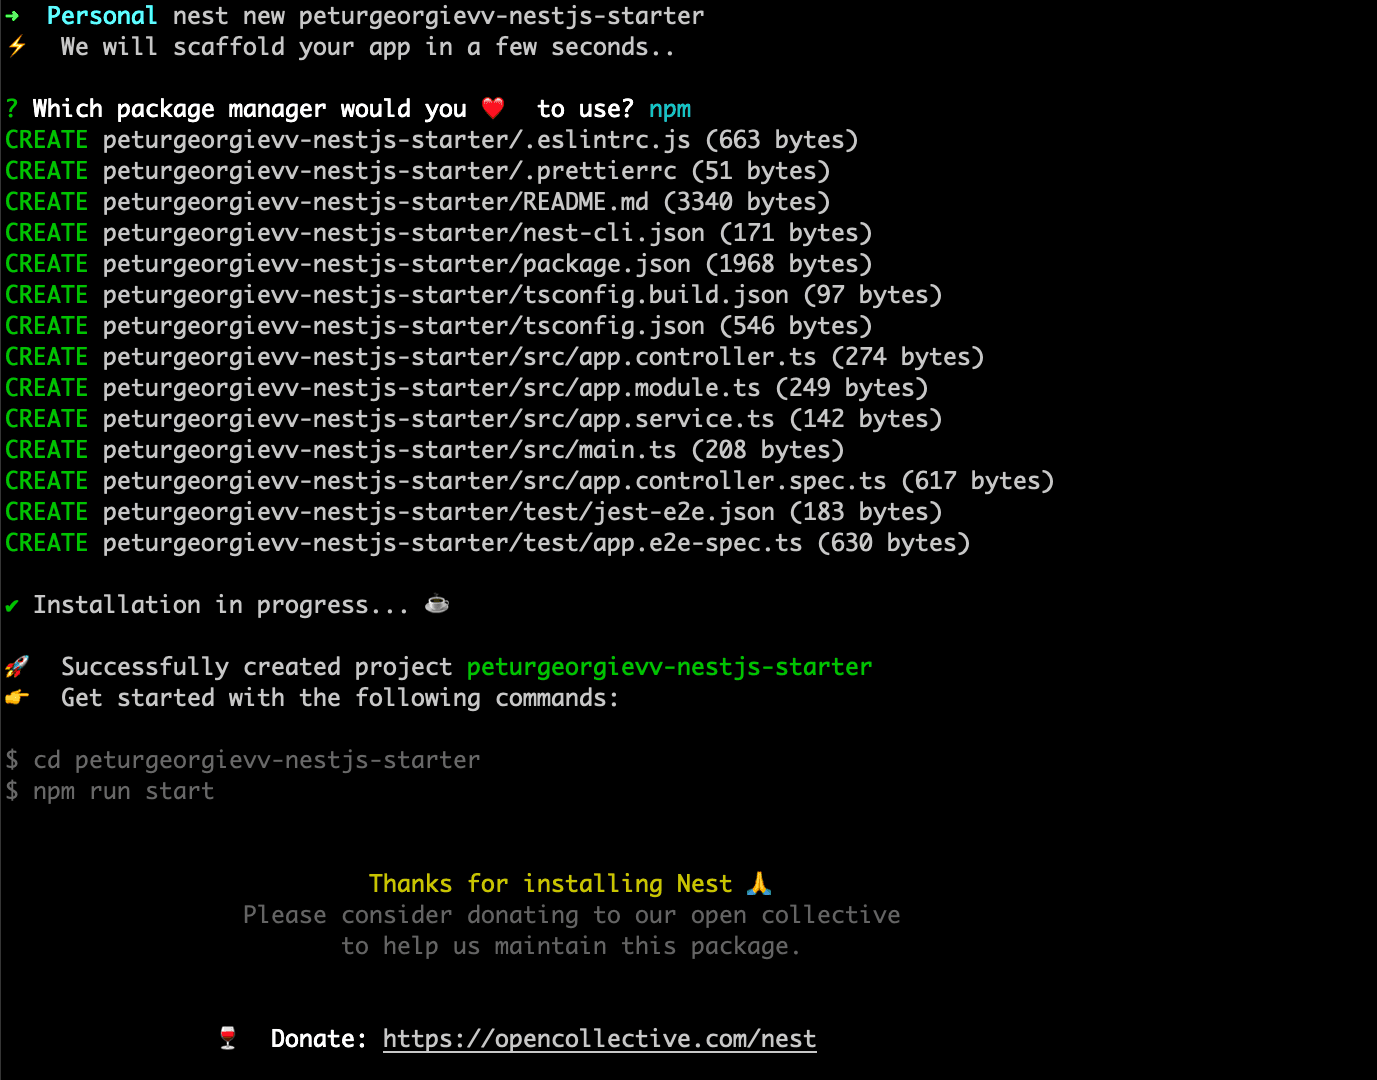
We are even prompted as to what we should do next for our project to be started. While in the same terminal run the following commands to navigate to the folder and start the project in development mode. Running the latter command should show you a log similar to - [Nest] 36729 - XX/XX/XXXX, XX:XX:XX LOG [NestApplication] Nest application successfully started.
cd <project-name>
npm run start:dev
Open up your editor of choice (mine is VSCode) and let's continue adding to our future structure and installing more dependencies for GraphQL and TypeORM.
GraphQL installation
We won't be explaining here what is GraphQL and why to use it, as there will be another article for this. So let's start by installing the needed dependencies. We'll use Apollo as a server instead of Mercurius or Fastify. You can read more about apollo-server here. Run the below command in your project terminal.
npm i @nestjs/graphql @nestjs/apollo @apollo/server graphqlLet's create a folder that will encapsulate all our GraphQL logic. There is a possibility to do it from the CLI, but I personally don't enjoy working with it, so we will go the old way. Create a folder src/graphql and add a file inside named graphql.module.ts. Inside this file let's add the below code.
import { ApolloDriverConfig, ApolloDriver } from '@nestjs/apollo';
import { Module } from '@nestjs/common';
import { GraphQLModule } from '@nestjs/graphql';
import { join } from 'path';
import { ApolloServerPluginLandingPageLocalDefault } from '@apollo/server/plugin/landingPage/default';
import { Request, Response } from 'express';

export type GraphqlContext = {
  req: Request;
  res: Response;
};

@Module({
  imports: [
    GraphQLModule.forRootAsync<ApolloDriverConfig>({
      driver: ApolloDriver,
      imports: [],
      inject: [],
      useFactory: () => {
        return {
          context: ({ req, res }): GraphqlContext => ({
            req,
            res,
          }),
          autoSchemaFile: join(process.cwd(), 'src/schema.gql'),
          sortSchema: true,
          path: '/graphql',
          playground: false,
          introspection: process.env.NAMESPACE !== 'production',
          plugins: [ApolloServerPluginLandingPageLocalDefault()],
          persistedQueries: false,
          fieldResolverEnhancers: ['interceptors', 'guards'],
        };
      },
    }),
  ],
})
export class GraphqlModule {}
Here we're initializing our GraphQL module with some default configurations. Let's explain it:
- Driver - as said we're using Apollo
- Context - we're defining and typing our context so it could be further used inside resolvers, mutations or whenever needed along the application and enriching it with the request and response object from express
- Auto schema file - we're going to use Code First approach, so we want our schema to be generated automatically
- Introspection - it's important to stop introspection for production and we're doing it with environment variable that will be defined later on
- Plugins - we use this plugin for our landing page
- Field resolver enhancers - used to allow interceptors and guards in the future
As with REDIS or different types of event providers, it's possible that dates are not sent or received correctly. Let's add a custom Scalar type for a date. Create a folder for scalars and a file src/graphql/scalars/date.scalar.ts. Add the code shown below to make our parsing of dates error prone.
import { Scalar, CustomScalar } from '@nestjs/graphql';
import { Kind, ValueNode } from 'graphql';

// We need to create a custom scalar to handle the Date type
@Scalar('Date', () => Date)
export class DateScalar implements CustomScalar<number, Date> {
  description = 'Date custom scalar type';

  parseValue(value: Date): Date {
    return value; // value from the client
  }

  serialize(value: Date | string): number {
    if (typeof value === 'string') {
      return new Date(value).getTime();
    }
    return value.getTime(); // value sent to the client
  }

  parseLiteral(ast: ValueNode): Date {
    if (ast.kind === Kind.INT) {
      return new Date(ast.value);
    }
    return null;
  }
}
As you might already guessed we need to add this to our GraphQL module. Going back let's add in providers our Scalar and finish with our GraphQL module.
import { ApolloDriverConfig, ApolloDriver } from '@nestjs/apollo';
import { Module } from '@nestjs/common';
import { GraphQLModule } from '@nestjs/graphql';
import { join } from 'path';
import { ApolloServerPluginLandingPageLocalDefault } from '@apollo/server/plugin/landingPage/default';
import { Request, Response } from 'express';
import { DateScalar } from './scalars/date.scalar';

export type GraphqlContext = {
  req: Request;
  res: Response;
};

@Module({
  providers: [DateScalar],
  imports: [
    GraphQLModule.forRootAsync<ApolloDriverConfig>({
      driver: ApolloDriver,
      imports: [],
      inject: [],
      useFactory: () => {
        return {
          context: ({ req, res }): GraphqlContext => ({
            req,
            res,
          }),
          autoSchemaFile: join(process.cwd(), 'src/schema.gql'),
          sortSchema: true,
          path: '/graphql',
          playground: false,
          introspection: process.env.NAMESPACE !== 'production',
          plugins: [ApolloServerPluginLandingPageLocalDefault()],
          persistedQueries: false,
          fieldResolverEnhancers: ['interceptors', 'guards'],
        };
      },
    }),
  ],
})
export class GraphqlModule {}
If your project is started in dev mode, you'll notice that actually nothing changed in the logs. This is because our module is not yet imported into the app module. Navigate to app.module.ts that have been auto-generated for you. Inside the file, find the imports array and add GraphQL Module to make it known to the app. As you probably noticed an error is shown as in the picture below.

It means it can't find any GraphQL types to create its schema. Let's address this in the next chapters when adding TypeORM.
PostgreSQL Database Preparation
I use Docker Desktop to manage all my Docker containers, you would need it installed, as we will use Docker from here on for our database creation. For our integration with TypeORM, we will use PostgreSQL as a database and ease up our process by spinning a database with docker-compose. We won't dive deep into docker-compose for our db as there will be other more complex articles on how to use it and what it exactly does. For now, let's create a file at the top-level directory named docker-compose.yml and paste the content below.
version: '3.8'
services:
  postgres:
    image: postgres:15
    container_name: peturgeorgievv-nestjs-starter-db
    ports:
      - '5432:5432'
    environment:
      POSTGRES_USER: postgres
      POSTGRES_PASSWORD: root
    volumes:
      - my_postgres_data:/var/lib/postgresql/data # Persist data even when container shuts down
      - ./scripts/init.sql:/docker-entrypoint-initdb.d/init.sql

volumes:
  my_postgres_data:
It's simply creating a Docker container with Postgres installed and we will need a script, as shown in the volumes that we use init.sql. For the script, create a top-level folder named scripts and a file inside init.sql with the following content (this name will be used as a database in our env variables later on):
CREATE DATABASE "peturgeorgievv-nestjs-starter";

-- Grant all privileges on the database to the postgres user
GRANT ALL PRIVILEGES ON DATABASE "peturgeorgievv-nestjs-starter" TO "postgres";
Open up a new terminal in the same folder. Run the container with the command:
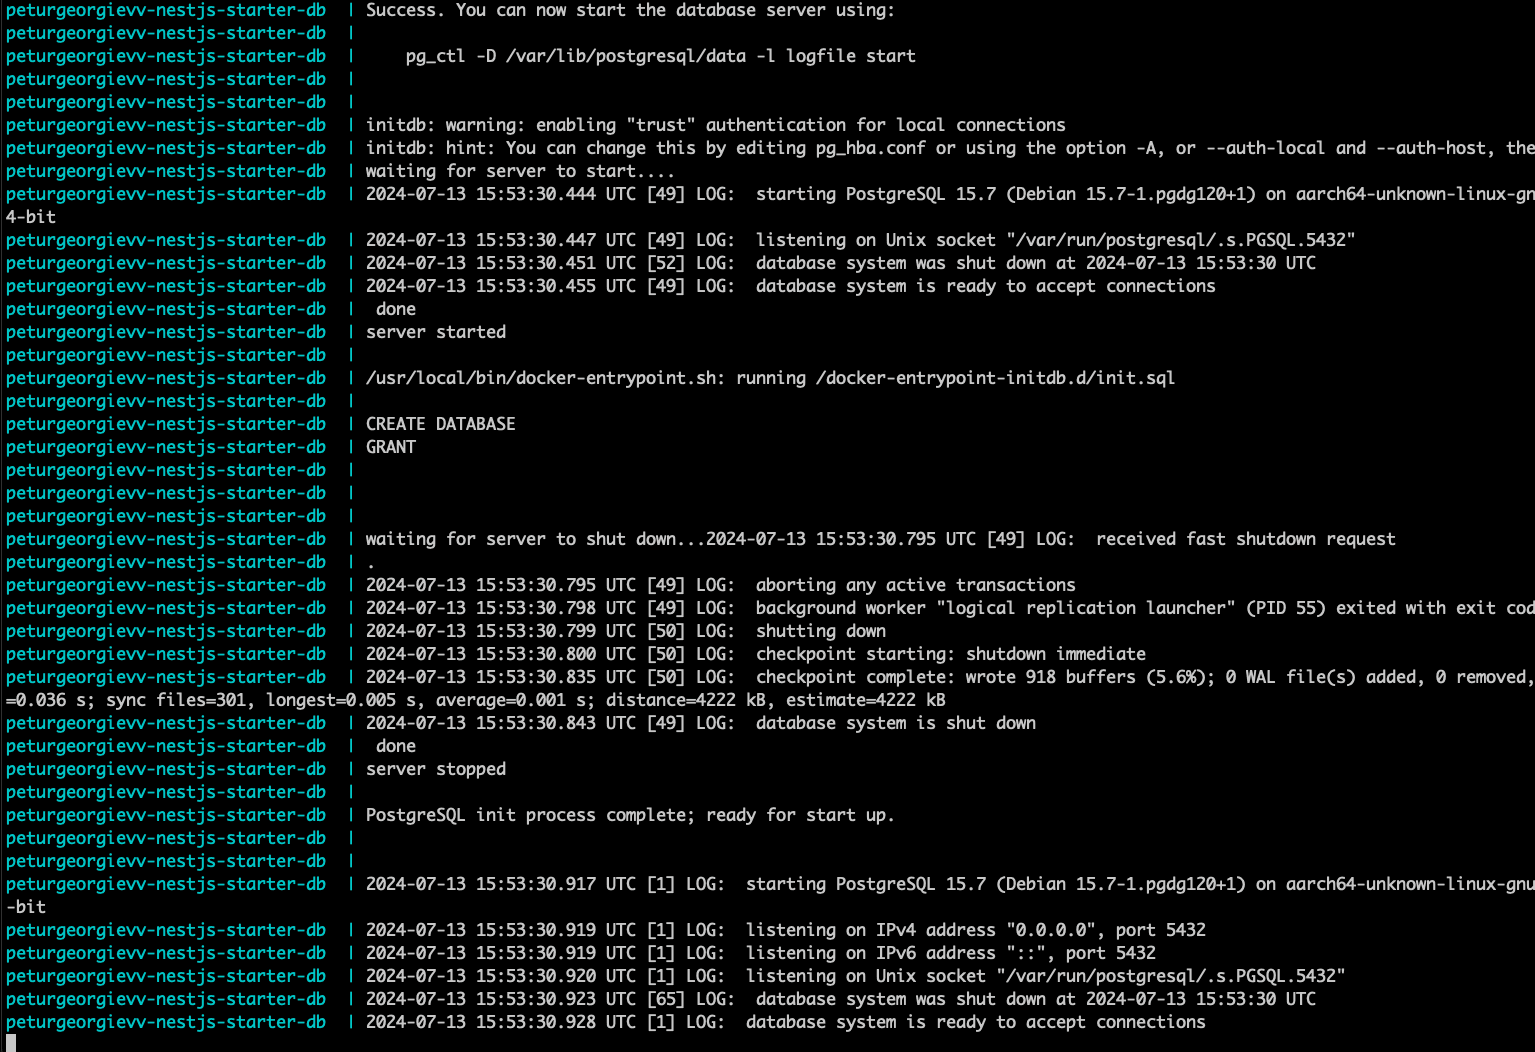
docker compose upIt should be working and you should see input similar to the screenshot. You must always run this command before running your NestJS project.
TypeORM Integration
To integrate our ORM we need to first install the dependencies. Run the command in your NestJS terminal.
npm install --save @nestjs/typeorm typeorm pg @nestjs/config joi class-validatorCreate a folder in src directory named db. Add a file and the path should look like this src/db/db.module.ts. Here we need to initialize our TypeORM client and set our variables that define what type of database we're using and it's credentials and configurations.
import { Module } from '@nestjs/common';
import { ConfigModule, ConfigService } from '@nestjs/config';
import { TypeOrmModule } from '@nestjs/typeorm';

@Module({
  imports: [
    TypeOrmModule.forRootAsync({
      imports: [ConfigModule],
      useFactory: async (configService: ConfigService) => {
        return {
          type: 'postgres',
          host: configService.get<string>('DB_HOST'),
          port: parseInt(configService.get<string>('DB_PORT'), 10),
          username: configService.get<string>('DB_USERNAME'),
          password: configService.get<string>('DB_PASSWORD'),
          database: configService.get<string>('DB_DATABASE'),
          synchronize: configService.get<string>('DB_SYNCH') === 'true',
          logging: configService.get<string>('DB_LOG') === 'true',
          entities: ['dist/**/*.entity{.ts,.js}'],
          migrations: ['dist/migrations/*{.ts,.js}'],
        };
      },
      inject: [ConfigService],
    }),
  ],
  providers: [],
  exports: [],
})
export class DbModule {}
As you've probably noticed we use configService which gets our environment variables from process.env. We haven't yet created our environment file, so it's time to do it. At top-level create a file named .env and add the following contents:
DB_HOST=localhost
DB_PORT=5432
DB_USERNAME=postgres
DB_PASSWORD=root
DB_DATABASE=peturgeorgievv-nestjs-starter
DB_LOG="true"
NAMESPACE=local
Note that DB_DATABASE should be the database name you added in init.sql file. As we've created our environment file, we need to import our DB module into app.module, and add our config module globally, so go ahead and do that. An example is shown of how it should look.
import { Module } from '@nestjs/common';
import { AppController } from './app.controller';
import { AppService } from './app.service';
import { GraphqlModule } from './graphql/graphql.module';
import { DbModule } from './db/db.module';
import { ConfigModule } from '@nestjs/config';
import * as Joi from 'joi';

@Module({
  imports: [
    GraphqlModule,
    DbModule,
    ConfigModule.forRoot({
      validationSchema: Joi.object({
        DB_HOST: Joi.string().required(),
        DB_PORT: Joi.string().required(),
        DB_USERNAME: Joi.string().required(),
        DB_PASSWORD: Joi.string().required(),
        DB_DATABASE: Joi.string().required(),
        DB_SYNCH: Joi.string().default('false'),
        DB_LOG: Joi.string().default('false'),
        NAMESPACE: Joi.string().required(),
      }),
      validationOptions: { abortEarly: true },
      isGlobal: true,
    }),
  ],
  controllers: [AppController],
  providers: [AppService],
})
export class AppModule {}
Now everything should be ready to move on to more complex steps. We currently have a working PostgreSQL database that has a connection with TypeORM. We've set DB_SYNCH to false, and we have to trigger migrations manually (more on migrations in another article). In src folder create another one named config and inside a file migrations-local.config.ts that will be used for our scripts. The path should be src/config/migrations-local.config.ts and the content is our initialization of the TypeORM DataSource object.
import { DataSource } from 'typeorm';

export default new DataSource({
  type: 'postgres',
  host: 'localhost',
  port: 5432,
  username: 'postgres',
  password: 'root',
  database: 'peturgeorgievv-nestjs-starter', // Don't forget to put the name of your init.sql database here
  migrations: ['src/db/migrations/*{.ts,.js}'],
  entities: ['src/**/*.entity{.ts,.js}'],
});
Next, we go to package.json and add the following lines in the scripts section.
{
 "typeorm:generate": "npx typeorm-ts-node-esm migration:generate -d src/config/migrations-local.config.ts",
 "typeorm:migrate": "npx typeorm-ts-node-esm migration:run -d src/config/migrations-local.config.ts",
 "typeorm:revert": "npx typeorm-ts-node-esm migration:revert -d src/config/migrations-local.config.ts",
 "typeorm:drop": "npx typeorm-ts-node-esm schema:drop -d src/config/migrations-local.config.ts",
 "typeorm:show": "npx typeorm-ts-node-esm migration:show -d src/config/migrations-local.config.ts"
}
This will allow us to do every possible action with our migrations. This is not yet useful until we write an entity to use it and see it in practice. In the next section, we'll create a User entity and migrate our database to know about it.
Creating our User Entity
Let's create a user entity, add a migration for it, and prepare ourselves for the final step that will make it all work together. Create another folder with a file in the following path src/user/user.module.ts that will be just a boilerplate for now as shown below.
import { TypeOrmModule } from '@nestjs/typeorm';
import { Module } from '@nestjs/common';
import { DbModule } from '../db/db.module';

@Module({
  imports: [DbModule, TypeOrmModule.forFeature([])],
  providers: [],
})
export class UserModule {}
To create a table in TypeORM we need to create entities. An entity is a class containing a subset of fields that we will decorate with appropriate decorators to make the columns appear in the table. Create a file in yet another folder src/user/entities/user.entity.ts that contains a minimalistic view of a user. It's validated with class-validator library to avoid incorrect data.
import { IsEmail, Length, MinLength } from 'class-validator';
import {
  Column,
  Entity,
  PrimaryGeneratedColumn,
  CreateDateColumn,
  UpdateDateColumn,
  Index,
} from 'typeorm';

@Entity()
export class User {
  @PrimaryGeneratedColumn('uuid')
  id: string;

  @Column({ type: 'varchar', nullable: false, unique: true })
  @IsEmail()
  @Index()
  @MinLength(5)
  email: string;

  @Column({ type: 'varchar', nullable: false })
  @Length(2, 55)
  firstName: string;

  @Column({ type: 'varchar', nullable: false })
  @Length(2, 55)
  lastName: string;

  @CreateDateColumn({ type: 'timestamptz' })
  createdAt?: Date;

  @UpdateDateColumn({ type: 'timestamptz' })
  updatedAt?: Date;
}
What we need here is a little bit of importing. Inside user module import as shown below and inside the App module, import the User module. You should know how by now. (don't worry the final code will be at the end with a link to a public repository)
TypeOrmModule.forFeature([User])Let's create our first migration now, to have our table created. Open a terminal in the NestJS folder and write the generate command with the file name after so that it will be created there.
npm run typeorm:generate src/db/migrations/initThis will generate a file in the directory written after the generate command and it should look as in the photo.
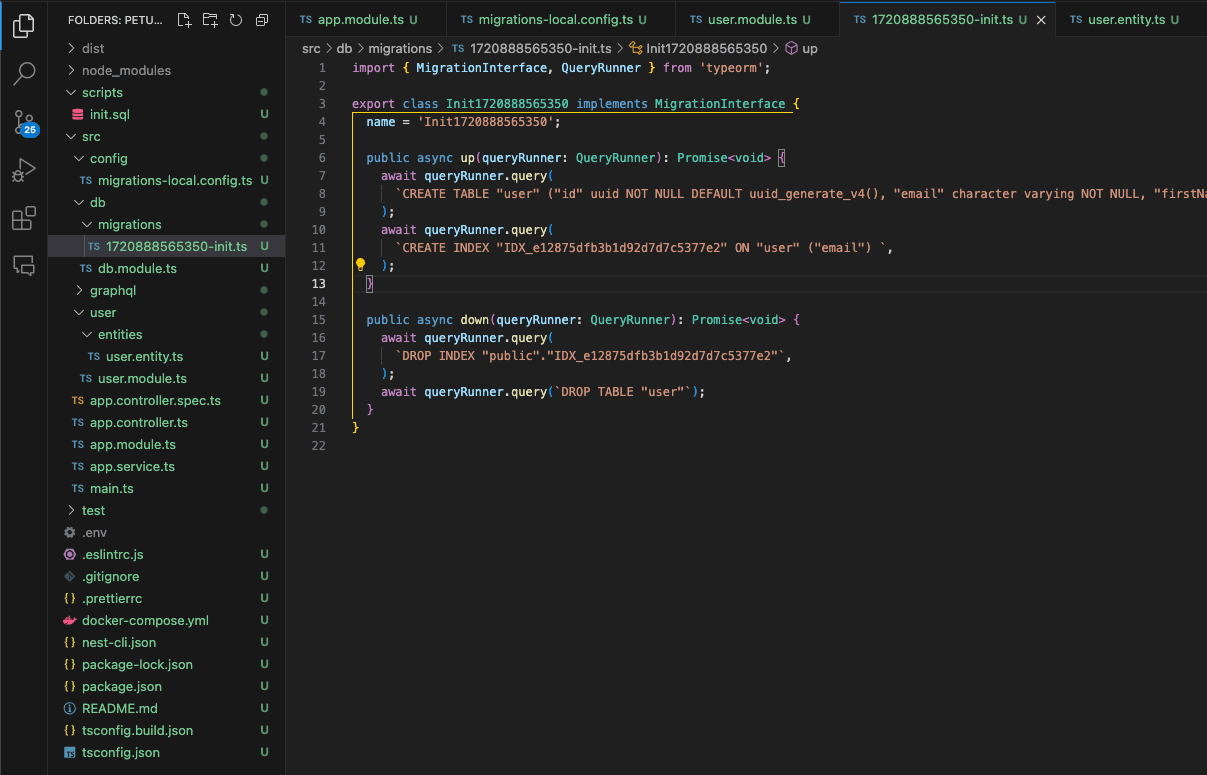
As we have successfully created our migration, for us to use our Users table, we need to first run our migrations with the following command:
npm run typeorm:migrateThis should trigger the SQL from the file to be directly executed into your PostgreSQL database.
It's time to connect the dots.
Connecting GraphQL and TypeORM
For our server to start working we just need to decorate our Entity with appropriate GraphQL decorators and create a resolver that will use it to generate its schema. The first step is to create a resolver you can read more about resolvers here. Create a file in src/users/user.resolver.ts with a GraphQL query fetching users with TypeORM DataSource.
import { Query, Resolver } from '@nestjs/graphql';
import { User } from './entities/user.entity';
import { DataSource } from 'typeorm';

@Resolver(() => User)
export class UserResolver {
  constructor(private readonly dataSource: DataSource) {}

  @Query(() => [User], { nullable: true })
  async users() {
    const users = await this.dataSource.getRepository(User).find({});
    return users;
  }
}
It's important to note that you should normally create a User Service or CQRS commands/queries to fetch this data, not directly in the resolver. Import the resolver inside the providers of the user module.
import { TypeOrmModule } from '@nestjs/typeorm';
import { Module } from '@nestjs/common';
import { DbModule } from '../db/db.module';
import { User } from './entities/user.entity';
import { UserResolver } from './user.resolver';

@Module({
  imports: [DbModule, TypeOrmModule.forFeature([User])],
  providers: [UserResolver],
})
export class UserModule {}
The last step is to decorate the User entity. Add object type to the entity, so that GraphQL should know how to treat it, and add fields decorator for each column so that it knows that it exists. Now when you paste the following code into your entity, the NestJS server should start and run normally without any errors.
import { Field, ID, ObjectType } from '@nestjs/graphql';
import { IsEmail, Length, MinLength } from 'class-validator';
import {
  Column,
  Entity,
  PrimaryGeneratedColumn,
  CreateDateColumn,
  UpdateDateColumn,
  Index,
} from 'typeorm';

@Entity()
@ObjectType()
export class User {
  @Field(() => ID, { nullable: false })
  @PrimaryGeneratedColumn('uuid')
  id: string;

  @Field(() => String, { nullable: false })
  @Column({ type: 'varchar', nullable: false, unique: true })
  @IsEmail()
  @Index()
  @MinLength(5)
  email: string;

  @Field(() => String, { nullable: false })
  @Column({ type: 'varchar', nullable: false })
  @Length(2, 55)
  firstName: string;

  @Field(() => String, { nullable: false })
  @Column({ type: 'varchar', nullable: false })
  @Length(2, 55)
  lastName: string;

  @Field(() => Date, { nullable: true })
  @CreateDateColumn({ type: 'timestamptz' })
  createdAt?: Date;

  @Field(() => Date, { nullable: true })
  @UpdateDateColumn({ type: 'timestamptz' })
  updatedAt?: Date;
}
If it's not running currently, just write npm run start:dev and it will start.
Final Testing with Apollo Studio
Just for visual representation that everything works correctly, open up a browser window on http://localhost:3000/graphql and you should see your GraphQL queries, in our case only users. In the screenshot, it's clearly seen that a DB query is executed. Now everything works correctly, and we're ready to extend our logic and make our app.
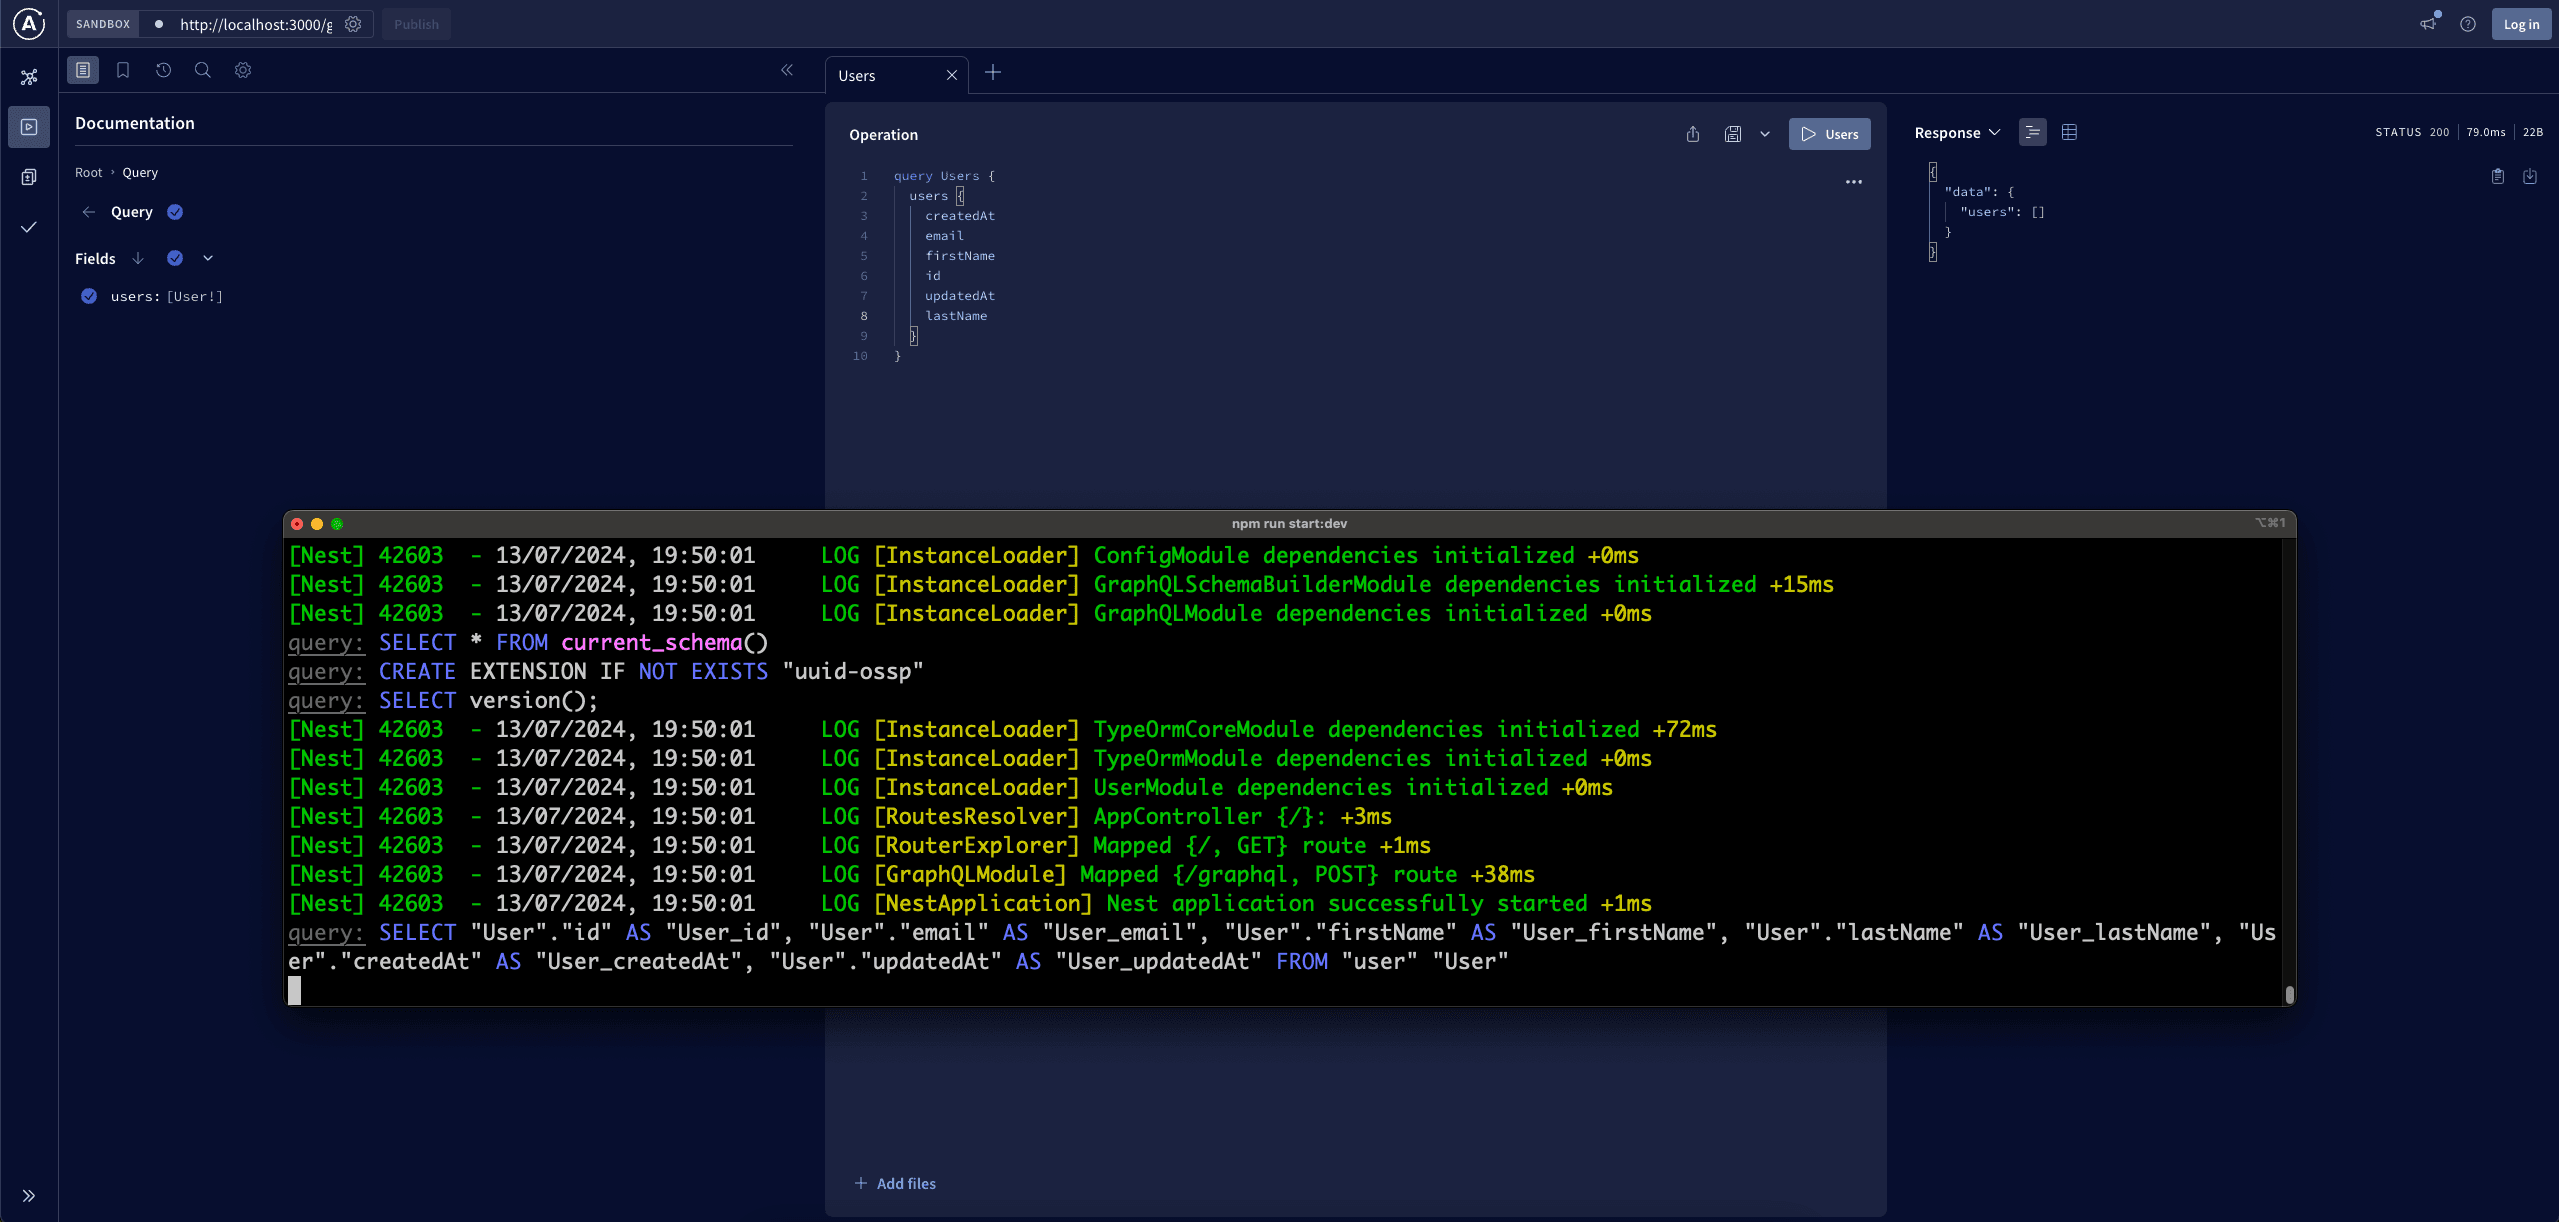
The full code from this tutorial is located here. It's inside the branch initial and we will update the repository with every article making it much more production-ready, as we're not there yet. We'll be using this starter and extending it in the future. The article became quite long, but it was needed, as our initial setup dictates how our application will grow.
I hope you liked it, you can subscribe to my newsletter and social media below and if you have any questions don't hesitate to message me on Twitter/X it's highly appreciated!
Related articles
How to add REDIS in Coolify with NestJS?
Adding REDIS is a performance boost, and you can easily do so in Coolify.

How to Build Robust Integrations for your Application? The production way!
Third-party integrations sound easy, but doing them in a way to not degrade the performance of your app is hard.
TypeORM Migrations Explained - Example with NestJS and PostgreSQL
Learn to handle TypeORM migrations in all scenarios. Understand which command to run and when.
Create REDIS Service with NestJS - Use in Every Project
Implementing REDIS in a NestJS service is essential for projects that plan to scale and care about performance. Another tool in your path to production.
Create Production Dockerfile with Migrations - NestJS with TypeORM and Docker
Build a robust structure of NestJS Dockerfile with running migrations and be ready to deploy anywhere.
My Newsletter
Subscribe to my newsletter and get the latest articles and updates in your inbox!