Create Production Dockerfile with Migrations - NestJS with TypeORM and Docker
Build a robust structure of NestJS Dockerfile with running migrations and be ready to deploy anywhere.
Building a Dockerfile that will be good for any environment is not an easy task, but not as hard as you might think. You need to understand what each command does and tailor it to your needs.
What we're going to do in this article is:
- Explain why we need Dockerfile
- Prepare and explain the commands we're going to put in our file
- Run TypeORM migrations
The link to our expanding Starter NestJS project that has TypeORM and GraphQL is here. I'll also add a link at the bottom with the branch that contains everything from this tutorial.
Why Dockerfile
Let's write a short explanation of what a Dockerfile is. I'm going to quote the original docker documentation.
"A Dockerfile is a text document that contains all the commands a user could call on the command line to assemble an image."
Dockerfile is a text file that consists of instructions and arguments to build Docker images. Instructions are not case-sensitive, but writing them in uppercase format is a convention and best practice - RUN. All instructions in a file are run in order.
There are different use cases for why a Dockerfile is needed, but in our case, it's to have an image ready for deployment in any environment.
Crafting our Dockerfile
The start of the file should always be with FROM instruction. Let's build our file step by step. It will be separated into three stages:
- development
- builder
- production
The first one is development. It installs development dependencies, copies needed configuration and source files, and builds the NestJS application.
FROM node:18 as development

WORKDIR /usr/src/app

COPY package*.json ./

RUN npm ci --development

COPY tsconfig*.json ./
COPY src/ src/

RUN npm run build
Our next stage is builder. This stage uses the same image to create a production-ready build. It installs only production dependencies and prepares the application for deployment by excluding unnecessary development dependencies.
FROM node:18 as builder

WORKDIR /app

ARG NODE_ENV=production

COPY package*.json ./

RUN npm ci --production
As our final stage is production, we want the node image to be the most lightweight, so we're using Alpine Linux to run the application. Here we install the required utilities, that are needed in our image, copy the dependencies from the previous stages, and define the startup command. This way we ensure that the container is optimized and minimal for production use.
FROM node:18-alpine as production

WORKDIR /app

RUN apk --no-cache add curl postgresql-client

COPY package*.json ./

COPY --from=builder /app/node_modules ./node_modules
COPY --from=development /usr/src/app/dist ./dist

EXPOSE 3000 443

CMD node dist/main
As you might've noticed we exposed two ports of our application.
- 3000 to allow HTTP traffic to our application internally, as this won't be exposed to the web
- 443 to enable HTTPS traffic enabling secure and encrypted communication over the web.
The last part is our start command, which runs after the container is built.
Run TypeORM migrations
You can check my article about NestJS setup with TypeORM to see how to integrate it if you haven't already. I'm going to simplify what we're going to add:
- DataSource production config file
- Modification of our command in the Dockerfile
Create a folder in src named config and add a file in path src/config/migrations-prod.config.ts that will hold our DataSource configuration. You can copy the below contents.
import { DataSource } from 'typeorm';
import { PostgresConnectionOptions } from 'typeorm/driver/postgres/PostgresConnectionOptions';

export const typeOrmConfig = (): PostgresConnectionOptions => ({
  type: 'postgres',
  host: process.env.DB_HOST,
  port: parseInt(process.env.DB_PORT, 10),
  username: process.env.DB_USERNAME,
  password: process.env.DB_PASSWORD,
  database: process.env.DB_DATABASE,
  synchronize: process.env.DB_SYNCH === 'true',
  logging: process.env.DB_LOG === 'true',
  entities: ['dist/**/*.entity{.ts,.js}'],
  migrations: ['dist/db/migrations/*{.ts,.js}'],
});

export default new DataSource({
  ...typeOrmConfig(),
});
This creates the config for TypeORM to get from our environment variables and use to trigger the migrations in the correct place. The next step is to combine and finalize our Dockerfile. I'm going to share our final version.
FROM node:18 as development

WORKDIR /usr/src/app

COPY package*.json ./

RUN npm ci --development
RUN rm -rf .npmrc

COPY tsconfig*.json ./
COPY src/ src/

RUN npm run build

FROM node:18 as builder

WORKDIR /app

ARG NODE_ENV=production

COPY package*.json ./

RUN npm ci --production

FROM node:18-alpine as production

WORKDIR /app

RUN apk --no-cache add curl postgresql-client

COPY package*.json ./

COPY --from=builder /app/node_modules ./node_modules
COPY --from=development /usr/src/app/dist ./dist

EXPOSE 3000 443

CMD npx typeorm migration:run -d dist/config/migrations-prod.config.js && node dist/main
The migration part is the last line:
CMD npx typeorm migration:run -d dist/config/migrations-prod.config.js && node dist/main
This runs the migrations with our already copied config file and after they're successfully run, it starts our container.
Testing our Integration
Open up a terminal and navigate to your project, or as we're doing to the starter. Do not forget to launch Docker Desktop before moving forward. Run the below command with the name of your project.
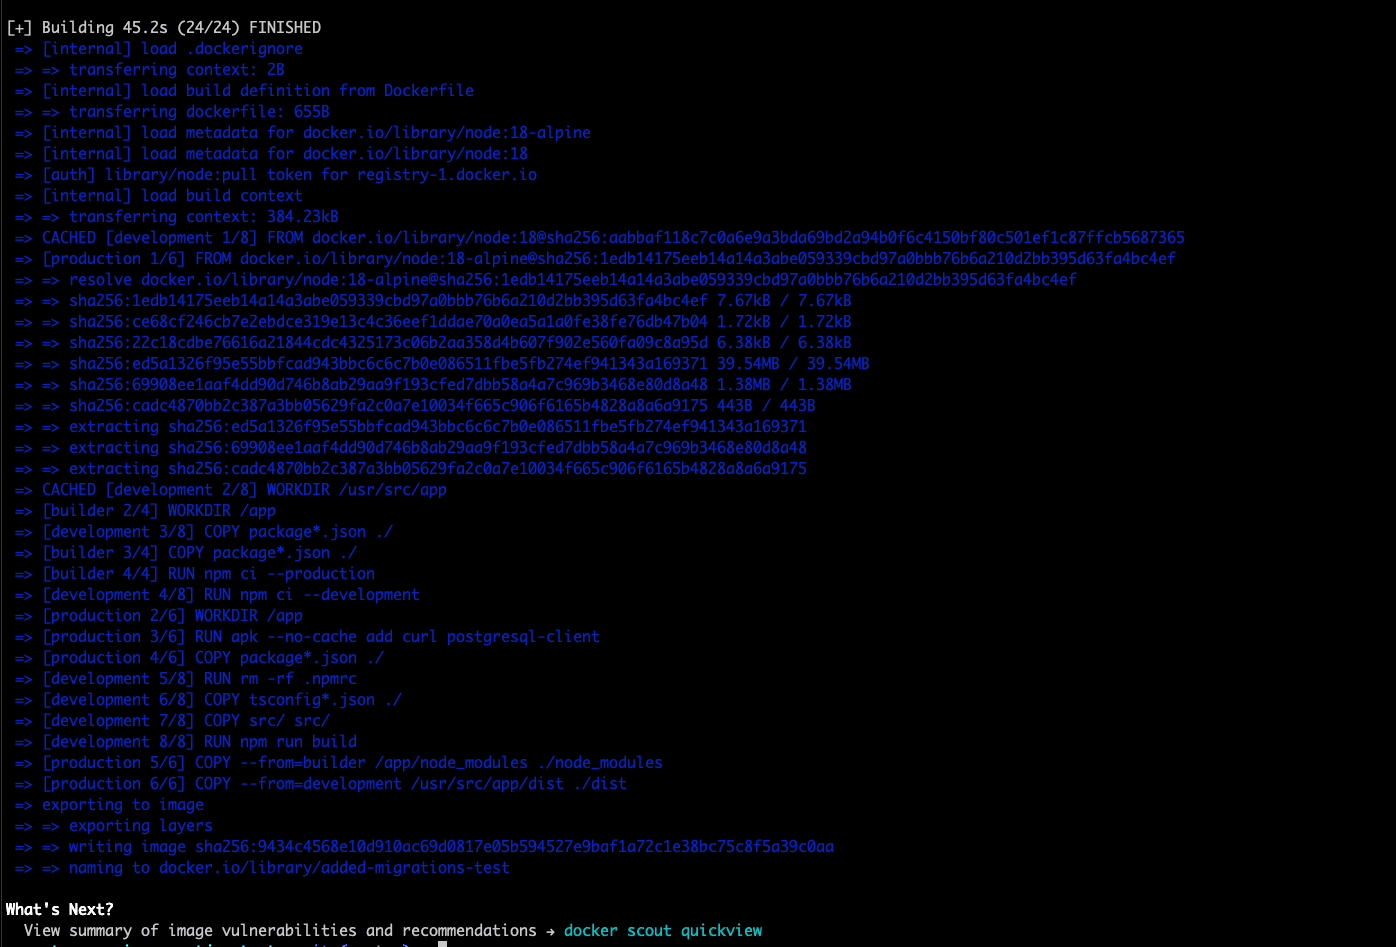
docker build -t <project-name-here> .This will run for a couple of minutes and the expected result should be similar to the photo below.
Wrapping Up
With all these steps we're finishing our production Dockerfile creation with migrations. It's easily extendable for any use case with NestJS. For this to work locally you need to inject the ENV variables as ARGS in the container. It's now easy to deploy wherever you decide to!
The branch with the latest commit for the migrations is linked here.
If there are any questions or suggestions you can contact me on Twitter/X or LinkedIn. A follow there is also much appreciated! You can subscribe to my newsletter below to get notified of new articles!
Related articles
How to add REDIS in Coolify with NestJS?
Adding REDIS is a performance boost, and you can easily do so in Coolify.

How to Build Robust Integrations for your Application? The production way!
Third-party integrations sound easy, but doing them in a way to not degrade the performance of your app is hard.
TypeORM Migrations Explained - Example with NestJS and PostgreSQL
Learn to handle TypeORM migrations in all scenarios. Understand which command to run and when.
Create REDIS Service with NestJS - Use in Every Project
Implementing REDIS in a NestJS service is essential for projects that plan to scale and care about performance. Another tool in your path to production.
Setup a NestJS Project with GraphQL, TypeORM - Production Ready
Build a scalable structure with NestJS, GraphQL and TypeORM with PostgreSQL for your database. Be production ready, and ready to scale.
My Newsletter
Subscribe to my newsletter and get the latest articles and updates in your inbox!