TypeORM Migrations Explained - Example with NestJS and PostgreSQL
Learn to handle TypeORM migrations in all scenarios. Understand which command to run and when.
TypeORM migrations are not a complex topic, yet for some, it takes more time to understand them as there are not many practical examples.
What we'll do today:
- Prepare our NestJS project to make any operations regarding migrations
- Add another entity named - Project
- Generate and revert multiple migrations for our entity
You can use our already set-up starter project from the branch initial. Step by step article is here. It's NOT necessary to use this starter, you just need a NestJS project with TypeORM and PostgreSQL already created.
You will have a link for the final code at the bottom.
Why Migrations?
You can be tempted to avoid migrations with setting in the TypeORM configuration synchronize: true. Don't.
It's critical to get used to generating, reverting, and writing additional logic in your migrations. This will help you have confidence when going into production.
But the "why" is that you will have unknown issues and data loss if you opt out of them. This should be enough of an issue for you to get better at dealing with them. In the end, I'll share a way that I like to handle them while working in a team.
Preparations
We'll prepare in a few steps while adding:
- Migration scripts in package.json
- TypeORM configuration
- Environment file
The first step will be to add these lines to our scripts in package.json.
    "typeorm:generate": "npx typeorm-ts-node-esm migration:generate -d src/config/migrations-local.config.ts",
    "typeorm:migrate": "npx typeorm-ts-node-esm migration:run -d src/config/migrations-local.config.ts",
    "typeorm:revert": "npx typeorm-ts-node-esm migration:revert -d src/config/migrations-local.config.ts",
    "typeorm:drop": "npx typeorm-ts-node-esm schema:drop -d src/config/migrations-local.config.ts",
    "typeorm:show": "npx typeorm-ts-node-esm migration:show -d src/config/migrations-local.config.ts"
Each line is a command that is needed to work with migrations. As you probably already saw there is a file named migrations-local.config.ts and if you're not using the starter, it's time to create it in the config folder inside src. The contents needed are below.
import { DataSource } from 'typeorm';

export default new DataSource({
  type: 'postgres',
  host: 'localhost',
  port: 5432,
  username: 'postgres',
  synchronize: false,
  password: 'root',
  database: 'peturgeorgievv-nestjs-starter',
  migrations: ['src/db/migrations/*{.ts,.js}'],
  entities: ['src/**/*.entity{.ts,.js}'],
});
Note that here we have our configuration set by our docker-compose file. It's important to stick with what you have as environment variables. Change whatever is needed here to match your project location.
We define our entities with <entity-name>.entity.ts. If you have a different naming structure or convention, check the whole config and match it accordingly.
Wrapping the config and creating a .env file. It needs these variables as it's also used in our db.module. (it's not needed if you're not running the project, as local migrations have their own config as set above)
DB_HOST=localhost
DB_PORT=5432
DB_USERNAME=postgres
DB_PASSWORD=root
DB_DATABASE=peturgeorgievv-nestjs-starter
DB_LOG="true"
Boilerplate for Project Entity
We need to create a couple of files and folders. They will be written in their full path.
Create those files:
- src/project/project.module.ts
- src/project/entities/project.entity.ts
Let's start with an empty entity with an id.
import { Field, ID, ObjectType } from '@nestjs/graphql';
import { Entity, PrimaryGeneratedColumn } from 'typeorm';

@Entity()
@ObjectType()
export class Project {
  @Field(() => ID, { nullable: false })
  @PrimaryGeneratedColumn('uuid')
  id: string;
}
We need to import this entity into our module as shown below. (Don't forget to import the Project module into app.module.ts)
import { TypeOrmModule } from '@nestjs/typeorm';
import { Module } from '@nestjs/common';
import { DbModule } from '../db/db.module';
import { Project } from './entities/project.entity';

@Module({
  imports: [DbModule, TypeOrmModule.forFeature([Project])],
})
export class ProjectModule {}
For our use case, this is more than enough. In the next step, we'll start with generating migrations.
Generate TypeORM Migrations
Our first step will be to generate the initial migration for the Project entity. TypeORM documentation has some information, but it's not so beginner-friendly.
Run the command below with the suffix as a path for the migration to be created. (<init> can be anything, it's just a file name)
npm run typeorm:generate src/db/migrations/initRunning this in our project terminal will create a migration file with a timestamp and the file name. You should see a message similar to the one below.
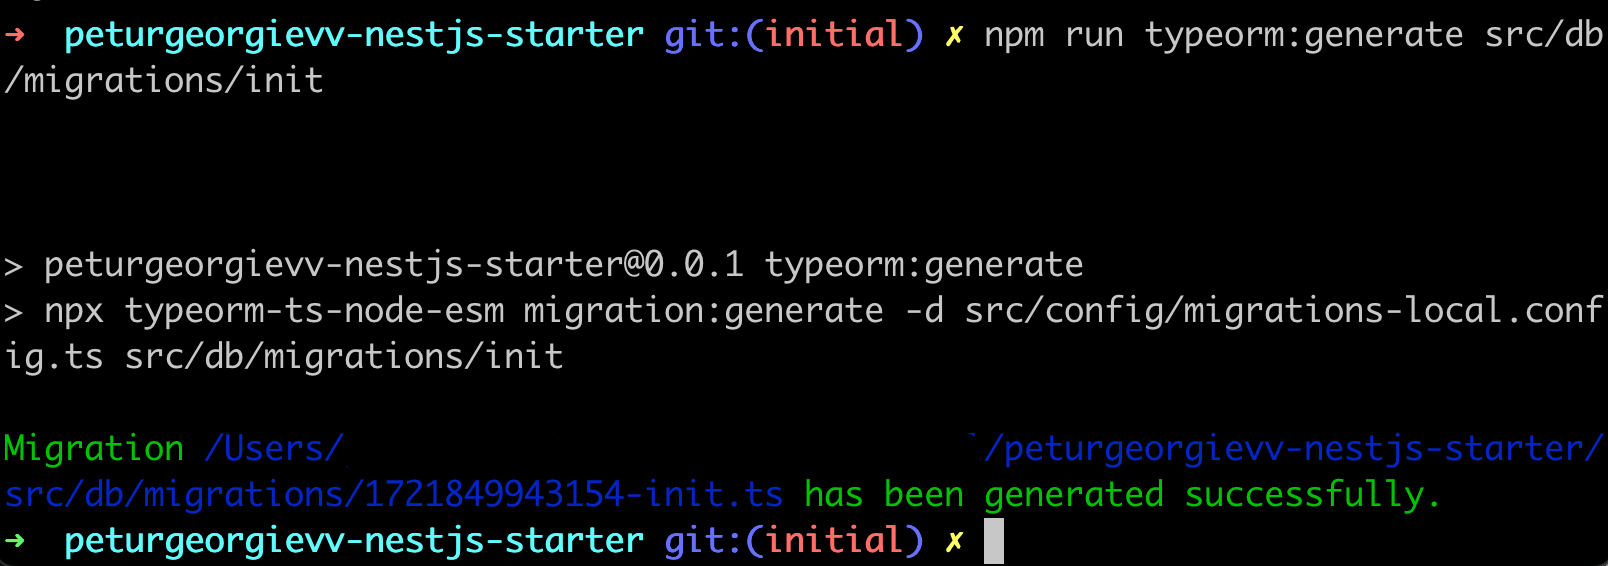
If we navigate to the file, the content will be similar to the code provided. It's running SQL code that creates a table and defines our columns. In our case, the primary key (PK) - ID with type UUID. The column type PrimaryGeneratedColumn (uuid_generate_v4) from TypeORM means that it will generate a UUID as ID on record creation if not provided as input.
import { MigrationInterface, QueryRunner } from 'typeorm';

export class Init1721849943154 implements MigrationInterface {
  name = 'Init1721849943154';

  public async up(queryRunner: QueryRunner): Promise<void> {
    await queryRunner.query(
      `CREATE TABLE "project" ("id" uuid NOT NULL DEFAULT uuid_generate_v4(), CONSTRAINT "PK_4d68b1358bb5b766d3e78f32f57" PRIMARY KEY ("id"))`,
    );
  }

  public async down(queryRunner: QueryRunner): Promise<void> {
    await queryRunner.query(`DROP TABLE "project"`);
  }
}
Even if this file is currently generated, trying to make some kind of operation like creating a project, will trigger an error. The reason is that we need to run the migration first.
This gets us to our second command. The migrate one. It will do a few things.
- Select our schema
- Check if migrations are pending with a similar query like the one below
query: SELECT * FROM "migrations" "migrations" ORDER BY "id" DESC- Start a transaction if some are pending
Let's run the migration script and see if it's all good. There shouldn't be any errors at this point.
npm run typeorm:migrateIf all works well your schema should be changed and a record should be inserted into the migrations table. We're looking for an output similar to the one below.
query: INSERT INTO "migrations"("timestamp", "name") VALUES ($1, $2) -- PARAMETERS: [1721849943154,"Init1721849943154"]
Migration Init1721849943154 has been  executed successfully.
query: COMMIT
This is the "easy" and straightforward part. Moving to the next steps, as adding more columns to our entity and reverting a migration.
Revert Migrations
Often the process is that you've added a column and there is a need for another one or that you're just testing out things. To avoid too many migrations or hard debugging, we'll use revert.
Let's assume that our Project entity needs a name, description, and date when it was created. The first step is to add them to our entity.
import { Field, ID, ObjectType } from '@nestjs/graphql';
import { Length } from 'class-validator';
import { Column, CreateDateColumn, Entity, PrimaryGeneratedColumn } from 'typeorm';

@Entity()
@ObjectType()
export class Project {
  @Field(() => ID, { nullable: false })
  @PrimaryGeneratedColumn('uuid')
  id: string;

  @Field(() => String, { nullable: false })
  @Length(2, 55)
  @Column({ type: 'varchar', nullable: false })
  name: string;

  @Field(() => String, { nullable: false })
  @Column({ type: 'varchar', nullable: false })
  description: string;

  @Field(() => Date, { nullable: true })
  @CreateDateColumn({ type: 'timestamptz' })
  createdAt?: Date;
}
If you've noticed there is @Length decorator from a popular library - class-validator. It helps us put constraints to avoid unwanted input. The next decorator is @CreateDateColumn. It's exactly what its name suggests - a column automatically set to the entity's insertion time.
We have two options:
- Generate new migration and run it
- Revert our init migration and run a new one
We'll go with option 2. It's much simpler than you can imagine, especially with cases that don't have a lot of modifications. Three steps process:
- Run - npm run typeorm:revert
- This will use the down method from our migration file and run the SQL from it
- Find the init migration file at src/db/migrations/<timestamp>-init.ts and delete it
- Run again - npm run typeorm:generate src/db/migrations/init
This will now create a file in the same format with up/down methods and more columns in the SQL generation for our entity. You probably guessed that now is the time for migrate command, but let's dive a little bit deeper.
There is another command that can help us understand what has already been migrated and what not. It's the show command. Run the command below and you should see a screen similar to the one I've shown. (note that I have a previous init migration from the starter repository, the second one is ours)
npm run typeorm:show
As you can see, there is only one X marked, because we haven't yet triggered migrate. Time to do so.
npm run typeorm:migrateIf you run the show command, all should be marked with [X], with no empty brackets. This is all you need to know about reverting. For the next step, let's again revert the migration, but don't delete the file.
npm run typeorm:revertEnrich the Migration File
It's important to understand that in production, migrations would need to be enriched often to update or modify current data. In our use case we don't have data to modify, but we can enrich the data to start with a single project peturgeorgievv.
Open the migration file and replace it with the following code. After the table creation, it inserts a record with what we've hard-coded.
import { MigrationInterface, QueryRunner } from 'typeorm';

export class Init1721930481972 implements MigrationInterface {
  name = 'Init1721930481972';

  public async up(queryRunner: QueryRunner): Promise<void> {
    await queryRunner.query(
      `CREATE TABLE "project" ("id" uuid NOT NULL DEFAULT uuid_generate_v4(), "name" character varying NOT NULL, "description" character varying NOT NULL, "createdAt" TIMESTAMP WITH TIME ZONE NOT NULL DEFAULT now(), CONSTRAINT "PK_4d68b1358bb5b766d3e78f32f57" PRIMARY KEY ("id"))`,
    );
    await queryRunner.query(
      `INSERT INTO "project" ("name", "description") VALUES ('peturgeorgievv', 'NestJS and TypeORM are awesome!')`,
    );
  }

  public async down(queryRunner: QueryRunner): Promise<void> {
    await queryRunner.query(`DROP TABLE "project"`);
  }
}
Now it's possible that you would need to get data from one table, save it here in a temporary table, and migrate it to the new one. It's not automatically possible with TypeORM or any other ORM. The code here is written in a transaction, so if something one part fails, it all fails.
If you're migrating already existing data it's good to enrich the down method too, by returning it to the previous state, even though it might not be possible in all cases. Now run the migrate command.
npm run typeorm:migrateCongrats, you have a project with my name!
If you don't like your data, or it's already corrupted in a way locally, drop the schema. It'll delete every table you have, just run both commands in sequence, and you'll have a clean start with only migrations data.
npm run typeorm:drop
npm run typeorm:migrate
My way of handling TypeORM Migrations
At some point, you'll work with a team. Creating too many migrations in a single pull request or commit is not easy to read or reasonable in most cases.
What I do while working on a task is that I create migrations whenever I need them. When I've finished my work, I revert all migrations to the point where it was before I started (after revert, delete the reverted file and repeat this for each file, don't delete all at once).
This helps me run a clean generate command with 1 migration and a clear message. If I need data migrations that are not automatic, it's much easier to find them later on. So to summarize the process.
- Change code in an Entity
- Run npm run typeorm:generate src/db/migrations/<name>.ts
- Run npm run typeorm:migrate
This will be more than enough for most cases! The link for the branch with the code from this article is here.
To wrap it up, TypeORM migrations ain't hard, you just need practice and structure of work.
If any of this was helpful or interesting, subscribe to my newsletter at the bottom of the page and receive short emails about new articles. A follow on Twitter/X or LinkedIn is highly appreciated too!
Related articles
How to add REDIS in Coolify with NestJS?
Adding REDIS is a performance boost, and you can easily do so in Coolify.

How to Build Robust Integrations for your Application? The production way!
Third-party integrations sound easy, but doing them in a way to not degrade the performance of your app is hard.
Create REDIS Service with NestJS - Use in Every Project
Implementing REDIS in a NestJS service is essential for projects that plan to scale and care about performance. Another tool in your path to production.
Create Production Dockerfile with Migrations - NestJS with TypeORM and Docker
Build a robust structure of NestJS Dockerfile with running migrations and be ready to deploy anywhere.
Setup a NestJS Project with GraphQL, TypeORM - Production Ready
Build a scalable structure with NestJS, GraphQL and TypeORM with PostgreSQL for your database. Be production ready, and ready to scale.
My Newsletter
Subscribe to my newsletter and get the latest articles and updates in your inbox!