How to deploy NextJS project for FREE (Vercel)
Steps to deploy sample NextJS project for Free on Vercel. Simple and yet effective for small projects.
This article will be written mostly for Junior developers who have not deployed anything yet. We will create a sample NextJS app with their CLI and add Tailwind to it. I will provide screenshots, explanations for each step of the way, and links. A little guide on how to deploy your project. You will need only a GitHub account (you can do it with GitLab, or BitBucket too). Time to start!
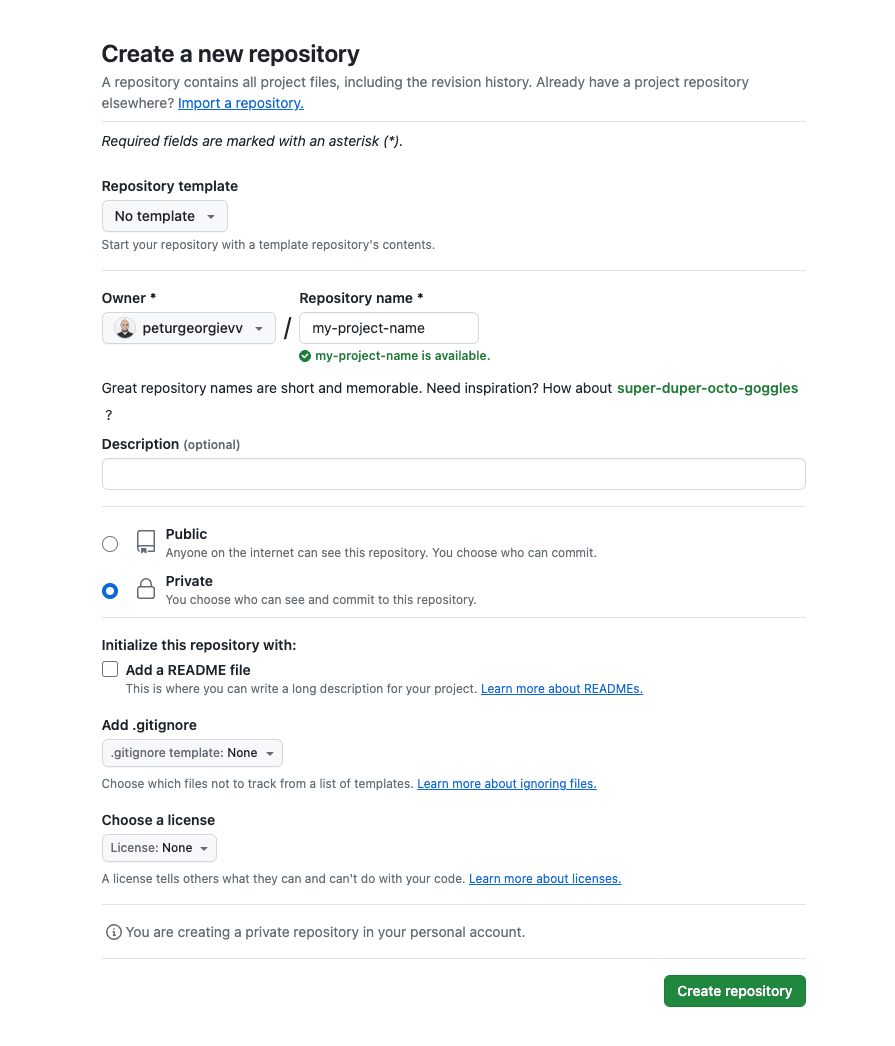
Let's first start with creating a repository to push our code. Open GitHub and click on the New Repository button. We are prompted with some options to fill as shown below. I suggest you make your repository Private if you don't plan on doing some open-source project. After filling everything just click on Create Repository.
Depending if you use SSH or HTTPS you will have two options in how to clone it. For the general reader let's go with HTTPS. You will have a command similar to the one below. Open up a terminal of your choice and write (I suggest you use node version 18/20):
git clone https://github.com/<username>/<my-project-name>.gitThis will have your repository cloned locally. Now to create our NextJS app we stay in the same folder and write the below command (note that the project-name is the same as in the clone command, so it goes in the same folder):
npx create-next-app@latest <my-project-name>This will prompt you for a couple of questions, which we will explain one by one.
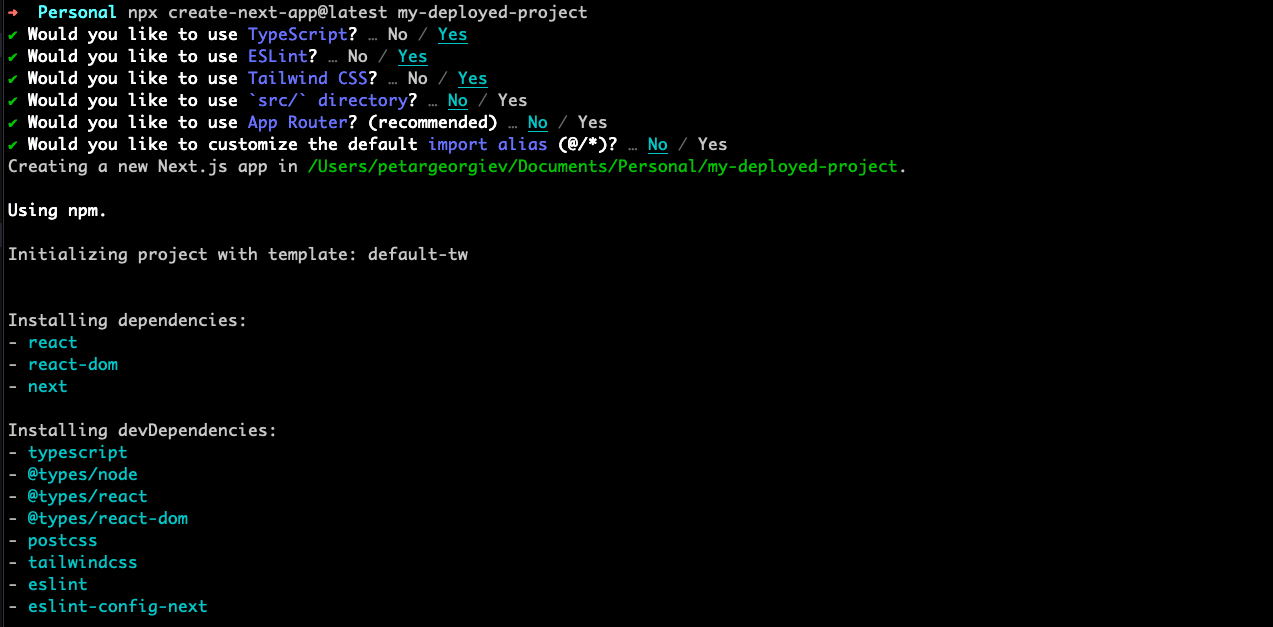
- TypeScript - Yes. I don't think there is a reason to even start a project without it. It saves you time in debugging issues that you might avoid.
- ESLint - Yes. We want to configure rules so that our codebase has a consistent style of writing.
- Tailwind CSS - Yes. You can choose no, if you are going to use custom CSS modules or any other styling of your choice.
- SRC - No. It's not widely used anyway it's just nesting your code.
- App Router - No. At the time of writing this article, it was not stable enough for me. Too many bugs occur and it's not widely adopted. But still, you can go with it, as they will push it forward anyway.
- Customizing the default import alias - No. I just see no reason for customizing it.
After we are done with the questions it will install all the needed dependencies and you can go inside and run it with the below command:
cd <my-project-name> && npm run devYou should already see your app running at http://localhost:3000. As this is not a tutorial on how to work with NextJS, we are just going to change the index.tsx file with some boilerplate and move to the deployment part (there will be tutorials on how to style, structure, and modify your app).
Copy the below code in pages/index.tsx
import Link from "next/link";
import Image from "next/image";

export default function Home() {
  return (
    <main className="px-4 sm:px-8 xl:px-0 mx-auto">
      <div className="mt-24">
        <h2 className="mb-4.5 text-2xl font-extrabold text-white sm:text-4xl xl:text-heading-2 flex justify-center">
          <Link href="/project">Here is my project!</Link>
        </h2>
        <div className="fixed bottom-0 left-0 flex h-48 w-full items-end justify-center bg-gradient-to-t from-white via-white dark:from-black dark:via-black lg:static lg:h-auto lg:w-auto lg:bg-none">
          <a
            className="pointer-events-none flex place-items-center gap-2 p-8 lg:pointer-events-auto lg:p-0"
            href="https://vercel.com?utm_source=create-next-app&utm_medium=default-template-tw&utm_campaign=create-next-app"
            target="_blank"
            rel="noopener noreferrer"
          >
            <span>very soon deployed by</span>
            <Image
              src="/vercel.svg"
              alt="Vercel Logo"
              className="dark:invert"
              width={100}
              height={24}
              priority
            />
          </a>
        </div>
      </div>
    </main>
  );
}
We removed some of the boilerplate from Vercel and added some Tailwind styles. Our next step is to go into Vercel and create our account with GitHub. Just go to Vercel Register Page and choose Hobby (personal account), write your name and in the next step you will be prompted to connect your Git account. You need to get to your account home page with the overview with the projects as shown below.

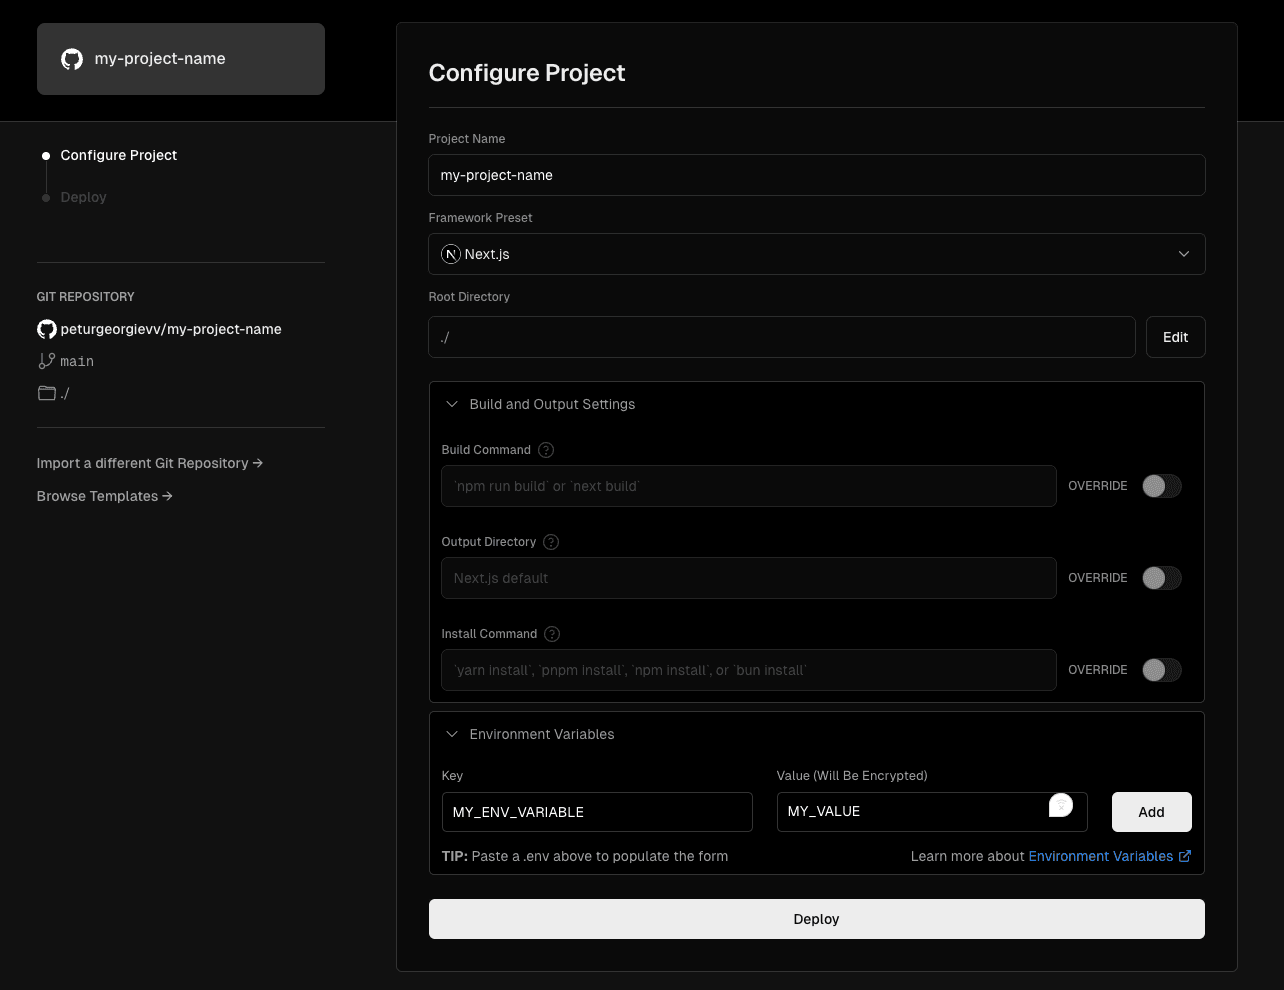
Click on the Add New and choose Project. You will be prompted to pick one from your account with which you registered. You will be shown the screen where you see your latest project or you can just search for it. Click the Import button.
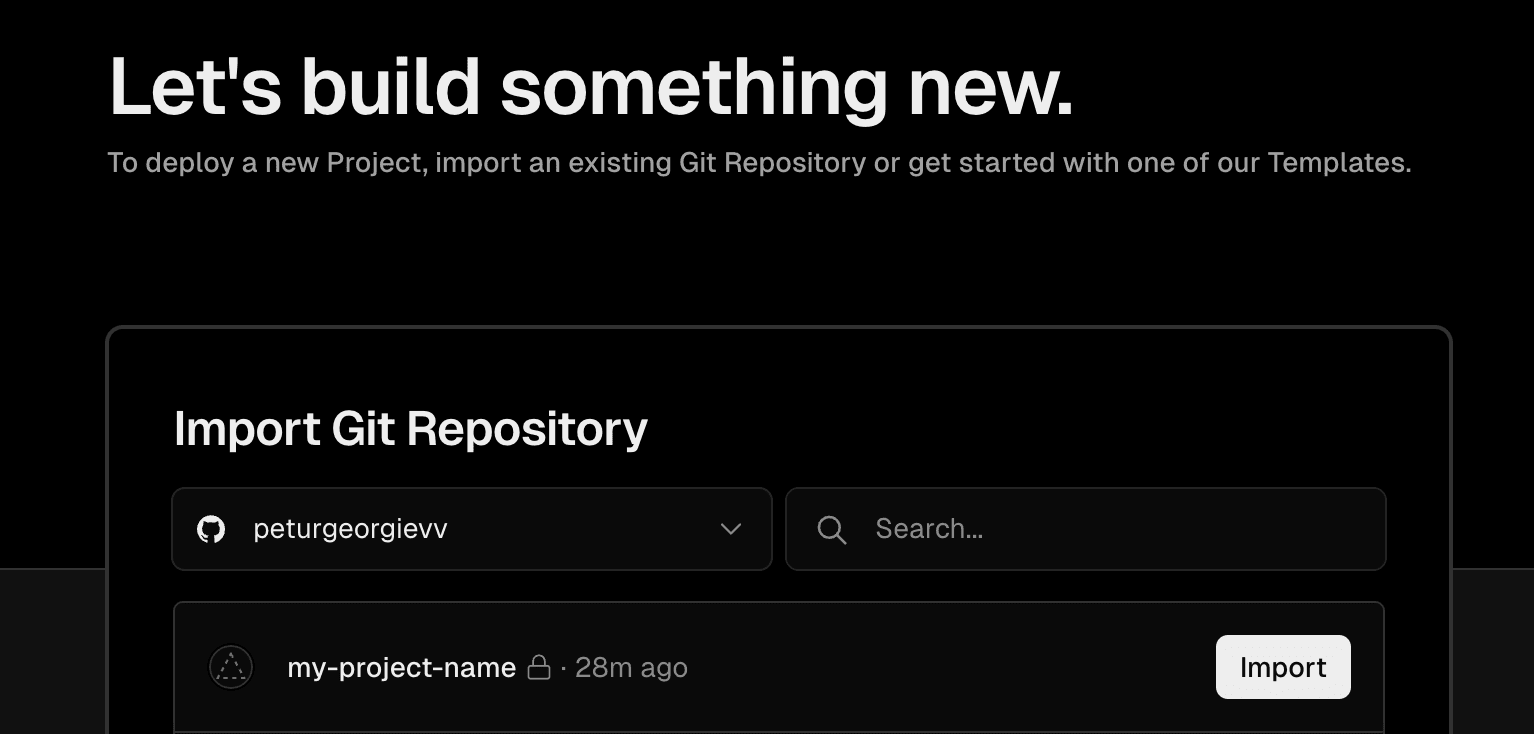
From here you can modify different configurations:
- Choose a name for your project - <my-project-name>
- Change Framework Preset - NextJS
- Possibility to change your build or install commands if you changed something in package.json
- You can add any ENV variables that you might need in the future
Click on Deploy when all is configured.
To see our changes go back the your terminal (the folder of the project). We need to push our changes to GitHub. For ease, just copy the below command that will commit and push your code.
git add . && git commit -m "Initial commit" && git pushThis will trigger a build and deploy. If all worked correctly you can go to your Projects page in Vercel and it will be shown with its name and a domain where it's already deployed. All done.
More advanced tutorials on NextJS and deployments will be present in the future! Hit me up on Twitter/X if you are interested in any particular topic.
Related articles

Deploy Prometheus and Grafana in Coolify (Code Example)
Step by step tutorial to deploy prometheus and grafana in coolify with human readable names.
How to add REDIS in Coolify with NestJS?
Adding REDIS is a performance boost, and you can easily do so in Coolify.

How to add Discord alarms to self-hosted Netdata (Coolify)
Having monitoring without alerts is like having a laptop without internet. It's good to have, but mainly useless.

How to Build Robust Integrations for your Application? The production way!
Third-party integrations sound easy, but doing them in a way to not degrade the performance of your app is hard.

Is Coolify Good for Production Deployments?
Self-hosting with Coolify can be a pleasent adventure, but you need to know the pros and cons.

How to deploy monitoring on your VPS with Coolify and Netdata
Deploy server-wide monitoring with Netdata and Docker compose for any VPS. Use in Coolify with a GitHub repository.
My Newsletter
Subscribe to my newsletter and get the latest articles and updates in your inbox!