ChatGPT Integration with NodeJS/NextJS - Step by Step Tutorial
Build a ChatGPT integration for communication as a Full-stack application with NextJS. Scale your project after the tutorial.

In this tutorial, we will build a simple NextJS application with an API route for communication with OpenAI API. You will learn how to create a NextJS project from scratch with the pages router that will be able to send and receive messages to their API.
You're going to need just OpenAI account that has at least 1$ in credits and a terminal with a node version above 18.
Let's create an app with the next-cli. Copy the below command and paste it to the terminal where you would like your folder/app to be created.
npx create-next-app@latest <project-name>For the questions that you will be prompted, you can answer as shown in the screenshot.

To not return later on, we will install all the dependencies we need for this project. Run the commands after the list in a consecutive order in the terminal.
- OpenAI npm package - For the communication with the API
- Shadcn-UI - for our simple form and styles (use all default options when prompted)
npm i openai
npx shadcn@latest init
npx shadcn@latest add form
npx shadcn@latest add input
npx shadcn@latest add toast
Proceeding to build steps
After you've run all the commands go to the project folder and open an editor of your choice. As this won't be a styling tutorial, we will be changing the pages/index.tsx file mainly. Now, change the contents of your file with the below code.
import { Inter } from "next/font/google";
import { zodResolver } from "@hookform/resolvers/zod";
import { chatbotSchema, ChatbotSchema } from "../lib/chat-bot.schema";
import { Button } from "../components/ui/button";
import {
  FormField,
  FormItem,
  FormLabel,
  FormControl,
  FormDescription,
  FormMessage,
  Form,
} from "../components/ui/form";
import { Input } from "@/components/ui/input";
import { useForm } from "react-hook-form";

const inter = Inter({ subsets: ["latin"] });

export default function Home() {
  const chatbotForm = useForm<ChatbotSchema>({
    resolver: zodResolver(chatbotSchema),
    defaultValues: {
      message: "",
    },
  });

  const onSubmit = async (values: ChatbotSchema): Promise<void> => {
    console.log(values);
  };

  return (
    <main
      className={`flex min-h-screen flex-col items-center p-24 ${inter.className}`}
    >
      <div className="mb-32">
        You can chat with me easily and securely. I am a chatbot that can help
        you with your queries. Please type your query and I will try to help
        you.
      </div>
      <Form {...chatbotForm}>
        <form
          onSubmit={chatbotForm.handleSubmit(onSubmit)}
          className="space-y-8"
        >
          <FormField
            control={chatbotForm.control}
            name="message"
            render={({ field }) => (
              <FormItem>
                <FormLabel>Message</FormLabel>
                <FormControl>
                  <Input
                    placeholder="Write a message to our chatbot"
                    {...field}
                  />
                </FormControl>
                <FormDescription>
                  Don't forget that we are just testing here.
                </FormDescription>
                <FormMessage />
              </FormItem>
            )}
          />
          <Button type="submit">Submit</Button>
        </form>
      </Form>
    </main>
  );
}
This will present us with a form in the middle of the screen which we can modify as we like. It has an onSubmit handler that we're using with react-hook-form (it gets installed when we init the shadcn form). Form hook useForm is used if we decide to validate or trigger any actions of the form itself, for the sake of this tutorial we only want submitting and simple validation.
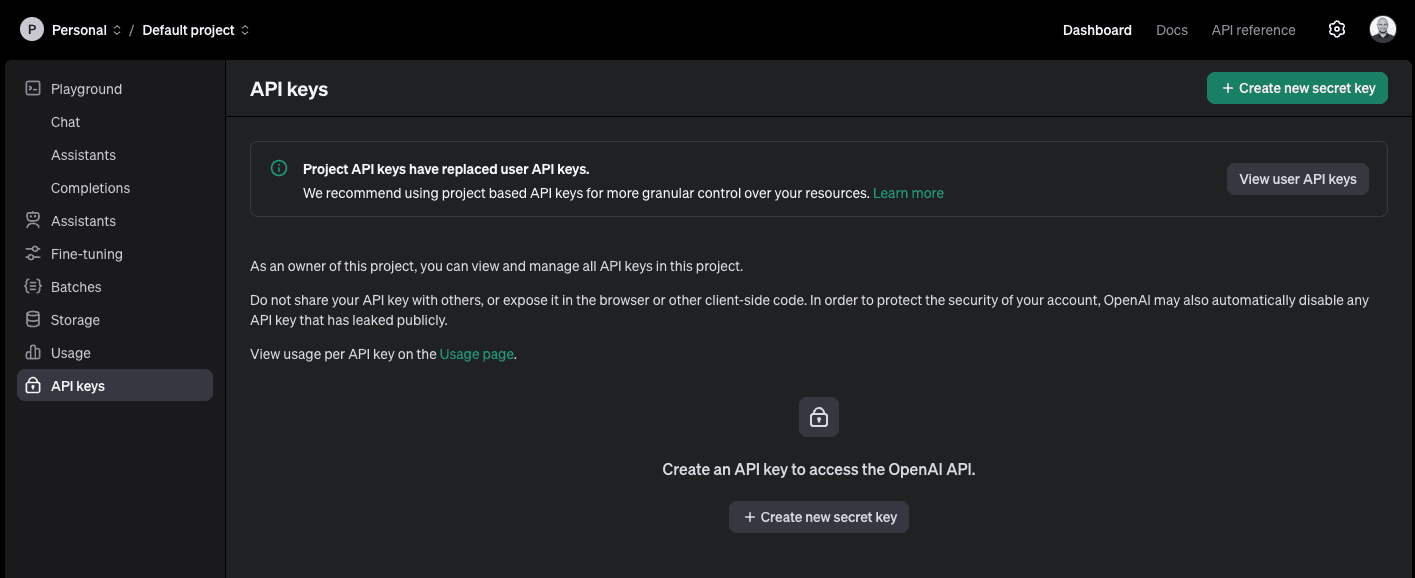
To use the OpenAI API, we need an API key. It comes from the OpenAI Account I mentioned in the beginning, so head on there and create one from the dashboard I've shown below. (create new secret key). Be sure to copy it as it won't be shown again!

Assuming we have an API Key already, we go back to our NextJS application and create a .env file, with the contents of our API key as an example below.
OPENAI_API_KEY=sk-proj-Q4maURAZGa8DnWcj71YJT4BlbkFJ1t3yoNsIcXl6y9tfEaobDo not expose your key anywhere. Don't make it NEXT_PUBLIC_ or show it in the FE. Otherwise, you might receive a big bill from OpenAI and not be happy about it. I suggest you even put usage limits on the key from the dashboard!
OpenAI connection
For our integration to be working, we need an API route. In NextJS we just create a file in the API folder. Let's create a file named /pages/api/chat-instructions.ts. For the sake of simplicity, we'll just create a handler that accepts a message and triggers a single call to OpenAI. You can paste the below code and we'll be explaining it.
import type { NextApiRequest, NextApiResponse } from "next";
import OpenAI from "openai";

type ChatInstructionsData = {
  message: string;
};

export default async function handler(
  req: NextApiRequest,
  res: NextApiResponse<ChatInstructionsData>
) {
  const input = req.body?.message;

  if (!input) {
    return res.status(400).json({
      message: "Please provide an input to the chatbot.",
    });
  }

  // Create an instance of OpenAI for further communication
  const openAI = new OpenAI({
    apiKey: process.env.OPENAI_API_KEY,
  });

  // Your instructions can be anything. Just don't make them too long, as the bot might lose context.
  const instructions =
    "You are a helpful assistant that can answer questions about the product. Our product consists of AI support for different parts of the business. You can answer questions about the product, its features, and how it can help businesses. You can also answer questions about the company, its mission, and its values. You can provide information about the pricing of the product and how businesses can get started with it. You can also provide information about the team behind the product and how they are working to make it better. You can provide information about the technology behind the product and how it is different from other solutions in the market. You can provide information about the security of the product and how it protects businesses from threats. You can provide information about the roadmap of the product and what features are coming next.

  const message = await openAI.chat.completions.create({
    messages: [
      {
        role: "system",
        content: instructions,
      },
      {
        role: "user",
        content: input,
      },
    ],
    temperature: 0.5,
    model: "gpt-3.5-turbo-0125",
  });

  const response = message.choices[0].message.content ?? "No response found";

  return res.status(200).json({
    message: response,
  });
}
The steps are as follows:
- Handler is declared and typed with our response
- Assuming the body has a message that we will use
- Creating an instance of OpenAI so that we can communicate with it. As you can see the env is in the API route, hence not shown to the end user
- Write up our instructions, as to now allow the bot to hallucinate. We can write a lot of restrictions here, so as to not allow sensitive data leakages
- Send a chat message to the completions API with instructions as system input and content of the message as the user input. We're using the gpt-3.5-turbo-0125 model as it's cheap
Now we have a fully working API route that communicates with OpenAI API. For production applications, don't allow the user to directly input it or hit it, as this might make your bill go crazy or get data that the user might not have access to.
Making it all work
We need to update our submit handler to connect to the API route. To make it more nice looking we will use a toastr from shadcn. Open up _app.tsx and paste the following contents.
import "@/styles/globals.css";
import type { AppProps } from "next/app";
import { Toaster } from "../components/ui/toaster";

export default function App({ Component, pageProps }: AppProps) {
  return (
    <div>
      <Component {...pageProps} />;
      <Toaster />
    </div>
  );
}
Next up create a file /lib/chat-bot.schema.ts that will hold the contents of your RHF schema.
"use client";

import { z } from "zod";

const message =
  "Please provide a message that is between 2 and 150 characters.";
export const chatbotSchema = z.object({
  message: z
    .string()
    .min(2, {
      message,
    })
    .max(150, {
      message,
    }),
});

export type ChatbotSchema = z.infer<typeof chatbotSchema>;
To finish it all up, what we will do is in pages/index.tsx to update our submit handler. To avoid mistakes I will provide the full code below. You can modify it in different ways to make it pretty.
import { Inter } from "next/font/google";
import { zodResolver } from "@hookform/resolvers/zod";
import { chatbotSchema, ChatbotSchema } from "../lib/chat-bot.schema";
import { Button } from "../components/ui/button";
import {
  FormField,
  FormItem,
  FormLabel,
  FormControl,
  FormDescription,
  FormMessage,
  Form,
} from "../components/ui/form";
import { Input } from "@/components/ui/input";
import { useForm } from "react-hook-form";
import { useToast } from "../components/ui/use-toast";

const inter = Inter({ subsets: ["latin"] });

export default function Home() {
  const { toast } = useToast();

  const chatbotForm = useForm<ChatbotSchema>({
    resolver: zodResolver(chatbotSchema),
    defaultValues: {
      message: "",
    },
  });

  const onSubmit = async (values: ChatbotSchema): Promise<void> => {
    console.log(values);

    const response = await fetch("/api/chat-instructions", {
      method: "POST",
      headers: {
        "Content-Type": "application/json",
      },
      body: JSON.stringify(values),
    });

    const data = await response.json();
    console.log(data);

    if (!data?.message) {
      toast({
        title: "Our AI Bot",
        description: "No response found.",
      });
      return;
    }

    toast({
      title: "Our AI Bot",
      description: data.message,
    });
  };

  return (
    <main
      className={`flex min-h-screen flex-col items-center p-24 ${inter.className}`}
    >
      <div className="mb-32">
        You can chat with me easily and securely. I am a chatbot that can help
        you with your queries. Please type your query and I will try to help
        you.
      </div>
      <Form {...chatbotForm}>
        <form
          onSubmit={chatbotForm.handleSubmit(onSubmit)}
          className="space-y-8"
        >
          <FormField
            control={chatbotForm.control}
            name="message"
            render={({ field }) => (
              <FormItem>
                <FormLabel>Message</FormLabel>
                <FormControl>
                  <Input
                    placeholder="Write a message to our chatbot"
                    {...field}
                  />
                </FormControl>
                <FormDescription>
                  Don't forget that we are just testing here.
                </FormDescription>
                <FormMessage />
              </FormItem>
            )}
          />
          <Button type="submit">Submit</Button>
        </form>
      </Form>
    </main>
  );
}
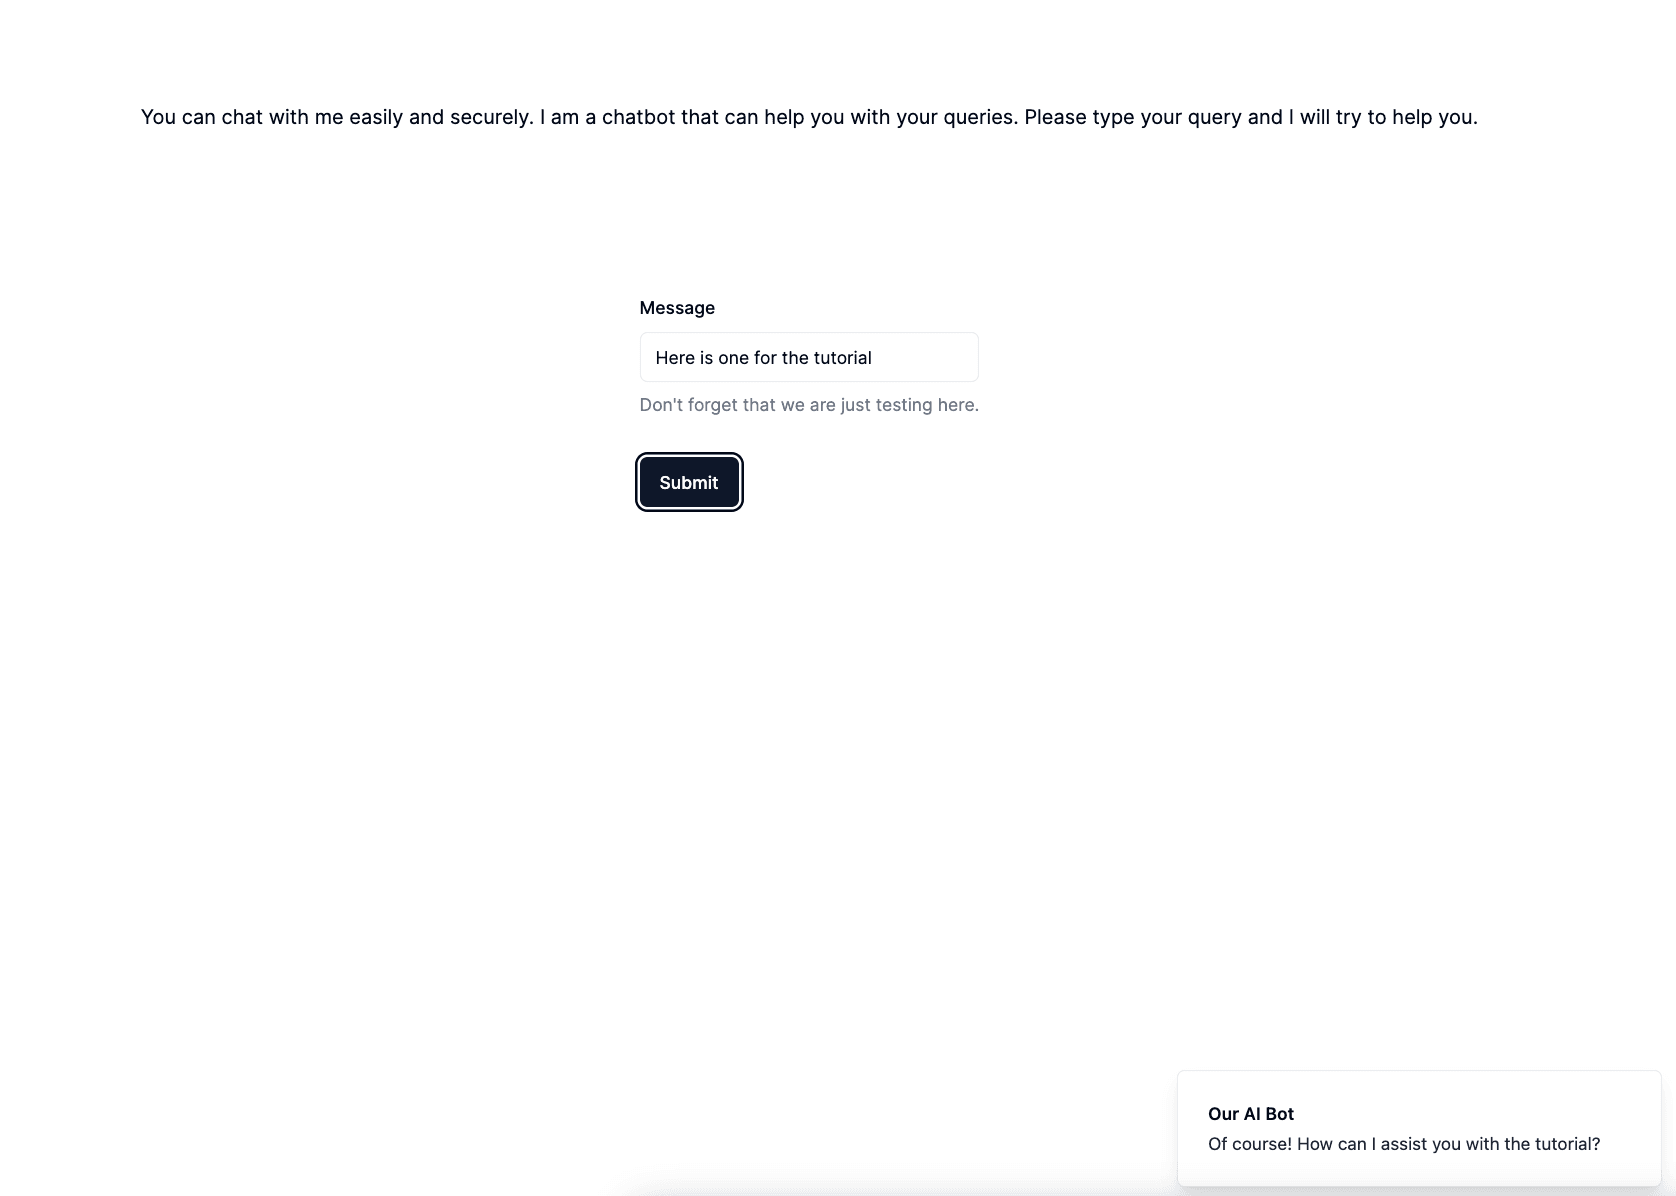
Now just type npm run dev and it all should be working correctly! Here is a screenshot of the App with a response from our Chat Bot.

We're all done. We covered NextJS API routes and how to integrate it all with OpenAI API. It's possible to extend it much more:
- caching responses to reduce token usage
- create user based app that tracks each user token usage, so we have per-user limitations
- secure the endpoint and clear the input before sending
- extend instructions in our favor
Hope you enjoyed it. If you have any questions or just interested in any particular topic, just DM me on Twitter/X. Follow there is much appreciated, as my newsletter is not yet done, and I will announce it there!
My Newsletter
Subscribe to my newsletter and get the latest articles and updates in your inbox!
